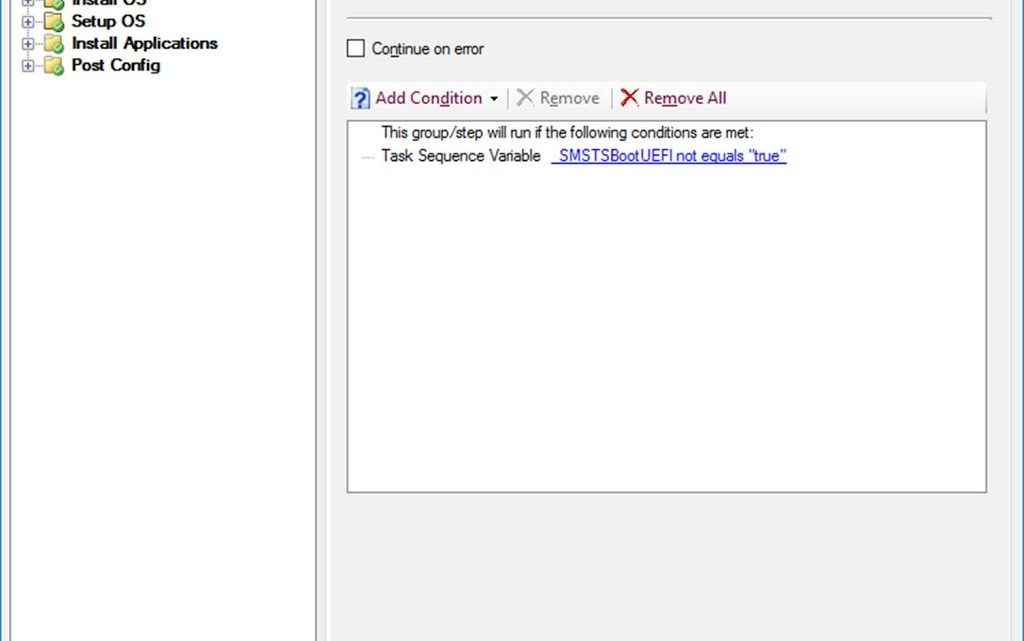
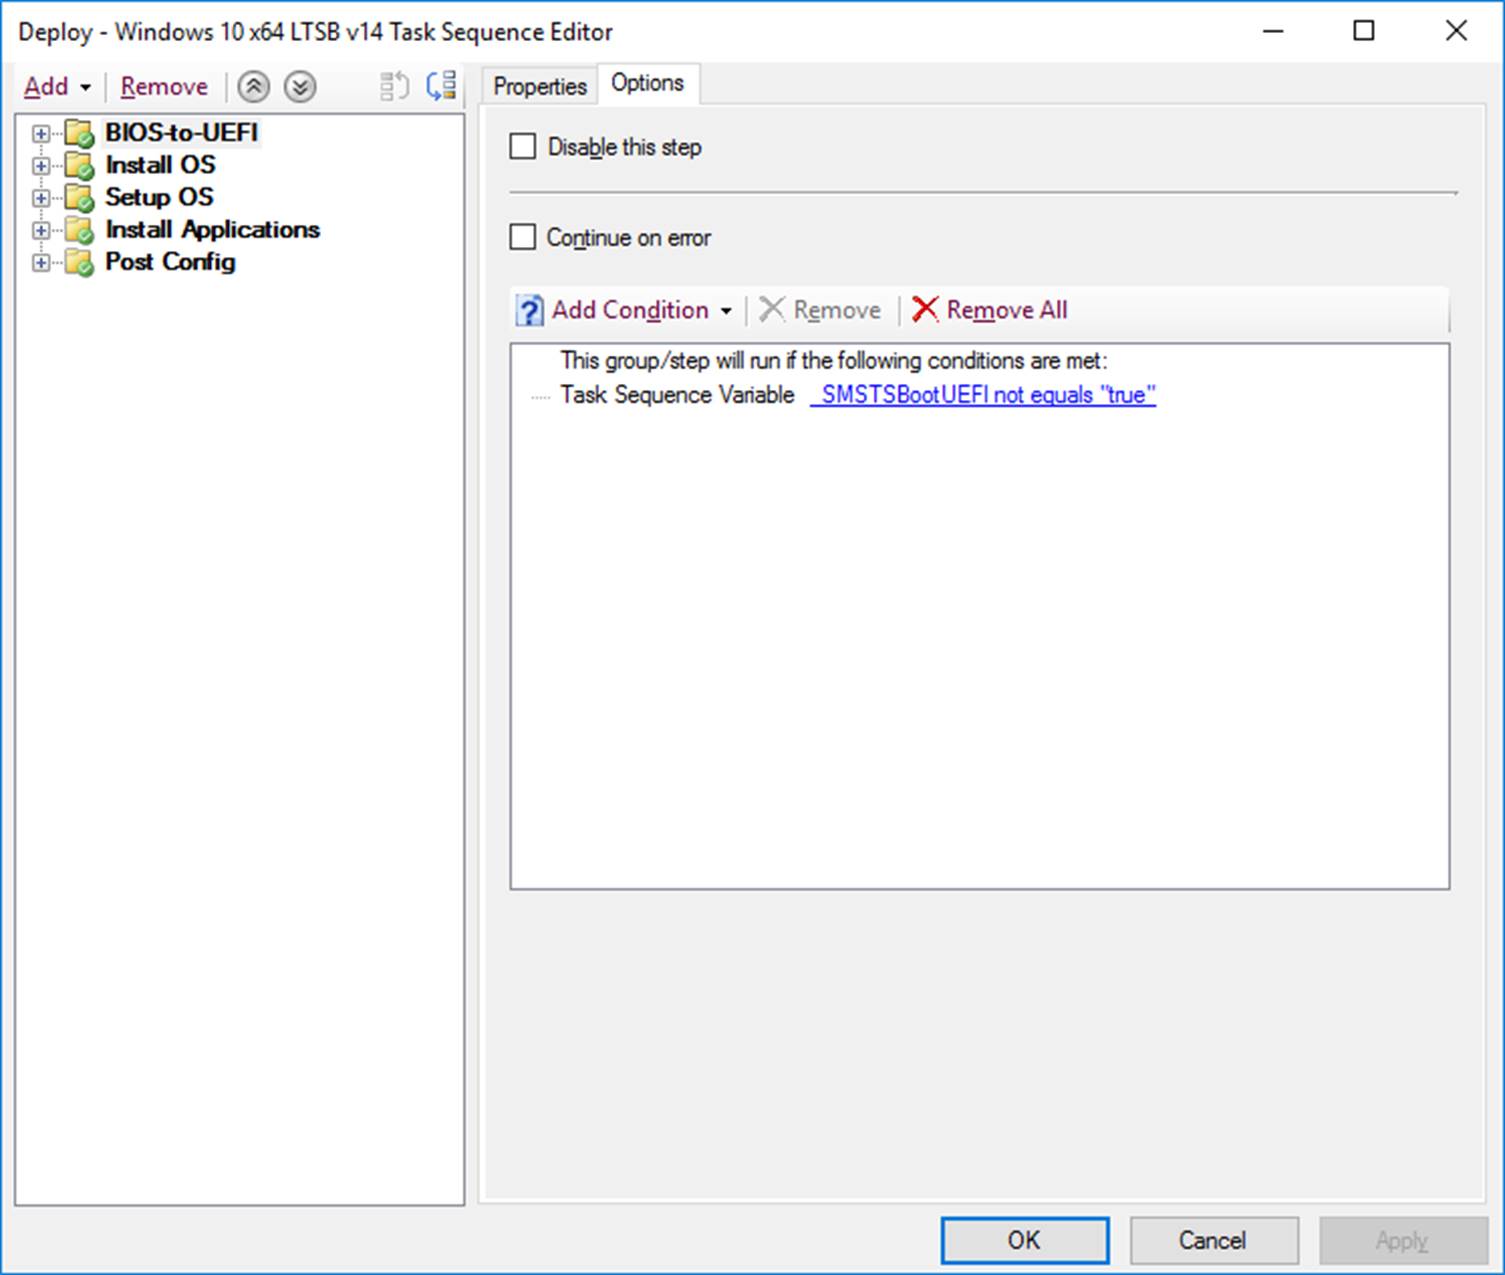
BIOS-to-UEFI group – this group will only run if the machine has booted from BIOS rather than UEFI
I’ve then added a message specific for a certain model of laptops that require a BIOS downgrade for reasons I’ll not go into. The selection criteria as a WMI query and the message box is displayed underneath.


This is quite a useful way to abandon a task sequence, reboot and display a message to the user.
powershell.exe -command (new-object -ComObject Microsoft.SMS.TsProgressUI).CloseProgressDialog() ; (new-object -ComObject wscript.shell).Popup(‘Your message.’,0,’Your message title’,0x0 + 0x30) ; Exit 1
Next, if the task sequence wasn’t launched from PXE, reboot to WinPE

Prepare the disk

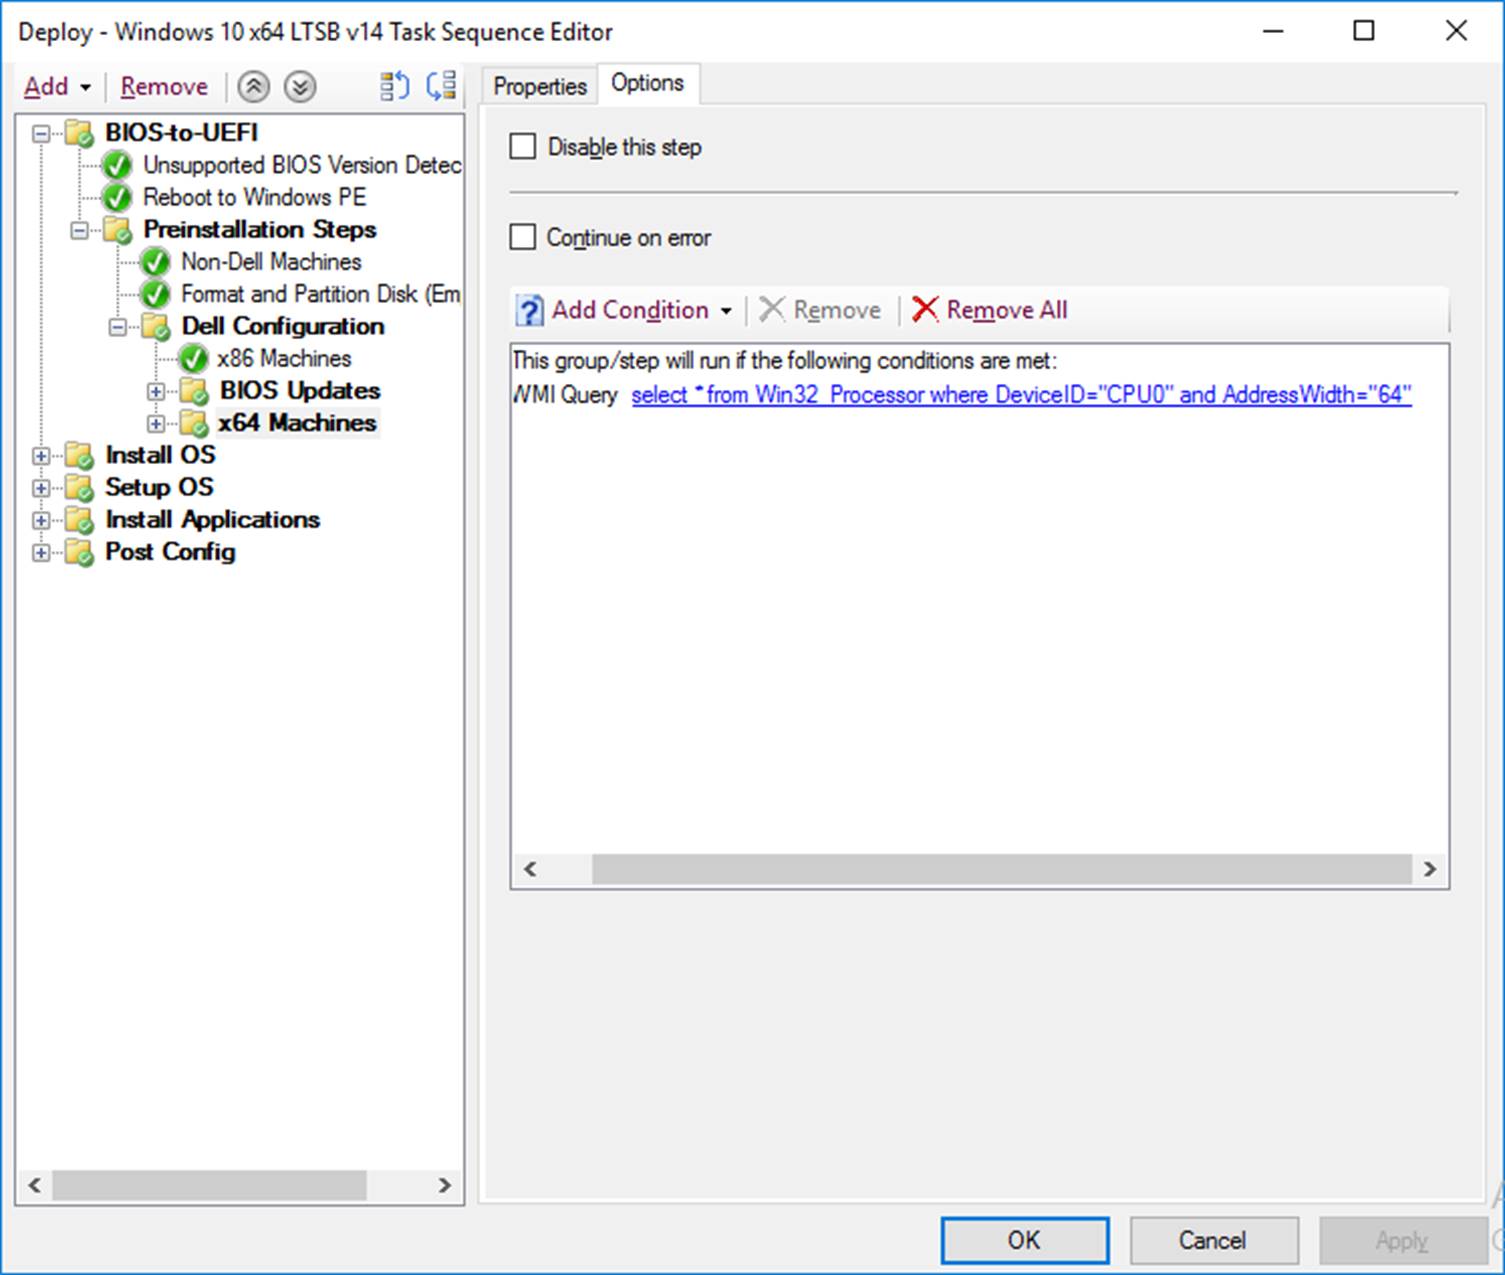
The next group runs only if it’s a Dell machine

The next step checks that it’s a 64bit machine. As I haven’t yet come across any x86 machines in this environment, they will just display a message box saying they’re not supported. If required, the x64 group can be duplicated and modified for x86 machnes. The WMI filters are as follows:
(64 Bit) select * from Win32_Processor where DeviceID=”CPU0″ and AddressWidth=”64″
(32 Bit) select * from Win32_Processor where DeviceID=”CPU0″ and AddressWidth=”32″
You will notice each of the following steps use a naming convention such as “x64 > Legacy > UEFI – Enable UEFI” to show the location of the given step. This just makes troubleshooting the task sequence easier.
It’s necessary to use the Dell CCTK tool to change BIOS settings on these laptops. Unfortunately there are a number of different CCTK tools, each of which is restricted to certain hardware types:
x86 – Standard
x86 – Legacy
x64 – Standard
x64 – Legacy
As all our machines are x64 we don’t need to worry about the x86 version. But I’ve split my task sequence here into Legacy and Non-Legacy, based on the outcome of the CCTK test. Thanks to the guys at scconfigmgr.com whose steps and script I used as a basis for my script.
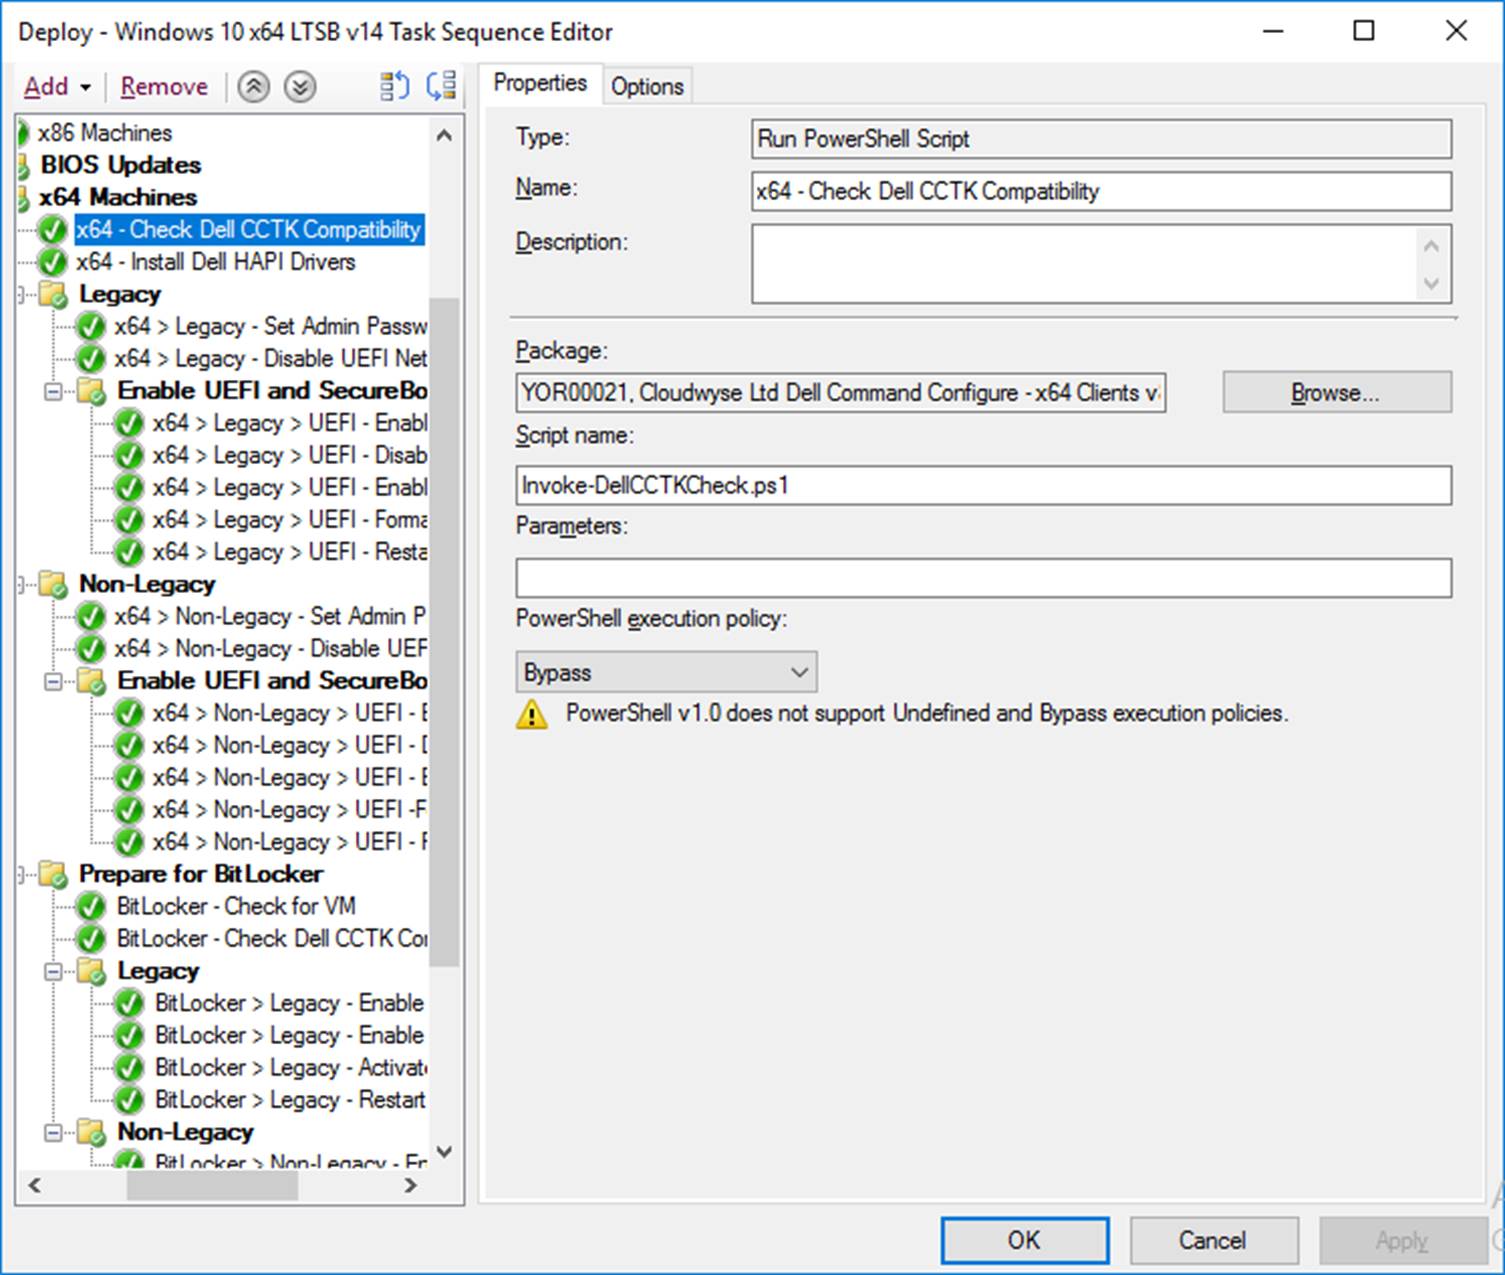
The script will create a TS Variable “IsLegacy” which will take a Boolean value from the script. This will determine whether the legacy or non-legacy group runs in the next step.
|
1 2 3 4 5 6 7 8 9 10 11 12 13 14 15 16 17 18 19 20 21 22 23 24 25 26 27 28 29 30 31 32 |
[cc lang ="powershell"]#Functions BEGIN { try { $TSEnvironment = New-Object -ComObject Microsoft.SMS.TSEnvironment -ErrorAction Continue } catch [System.Exception] { Write-Warning -Message "Unable to construct Microsoft.SMS.TSEnvironment object"; break } } PROCESS { # Set Logs Directory $LogsDirectory = Join-Path -Path $TSEnvironment.Value("SMSTSLogPath") -ChildPath "" function Write-CMLogEntry { param ( [parameter(Mandatory = $true, HelpMessage = "Value added to the log file.")] [ValidateNotNullOrEmpty()] [string]$Value, [parameter(Mandatory = $true, HelpMessage = "Severity for the log entry. 1 for Informational, 2 for Warning and 3 for Error.")] [ValidateNotNullOrEmpty()] [ValidateSet("1", "2", "3")] [string]$Severity, [parameter(Mandatory = $false, HelpMessage = "Name of the log file that the entry will written to.")] [ValidateNotNullOrEmpty()] [string]$FileName = "ApplyDellCCTK.log" ) # Determine log file location $LogFilePath = Join-Path -Path $LogsDirectory -ChildPath $FileName # Construct time stamp for log entry $Time = -join @((Get-Date -Format "HH:mm:ss.fff"), "+", (Get-WmiObject -Class Win32_TimeZone | Select-Object -ExpandProperty Bias)) # Construct date for log entry $Date = (Get-Date -Format "MM-dd-yyyy") # Construct context for log entry $Context = $([System.Security.Principal.WindowsIdentity]::GetCurrent().Name) # Construct final log entry $LogText = "" # Add value to log file try { Out-File -InputObject $LogText -Append -NoClobber -Encoding Default -FilePath $LogFilePath -ErrorAction Stop } catch [System.Exception] { Write-Warning -Message "Unable to append log entry to ApplyDellCCTK.log file. Error message at line $($.InvocationInfo.ScriptLineNumber): $($_.Exception.Message)" } } Write-CMLogEntry -Value "Staritng Dell CCTK compatibility check" -Severity 1 $CCTKVersion = (Get-ItemProperty .CCTK.exe | select -ExpandProperty VersionInfo).ProductVersion Write-CMLogEntry -Value "Running Dell CCTK version $CCTKVersion on host system" -Severity 1 $CCTKExitCode = (Start-Process cctk.exe -Wait -PassThru).ExitCode Write-CMLogEntry -Value "Reading Dell CCTK running output" -Severity 1 if (($CCTKExitCode -eq "141") -or ($CCTKExitCode -eq "140")) { Write-CMLogEntry -Value "Non WMI-ACPI BIOS detected. Setting CCTK legacy mode" -Severity 2 $LegacyCond = "True" } else { Write-CMLogEntry -Value "WMI-ACPI BIOS detected" -Severity 1 $LegacyCond = "False" } Write-CMLogEntry -Value "Setting LegacyCond task sequence variable" -Severity 1 $TSEnvironment.Value("IsLegacy") = $LegacyCond Write-CMLogEntry -Value "Legacy condition is $LegacyCond" -Severity 2 }[/cc] |
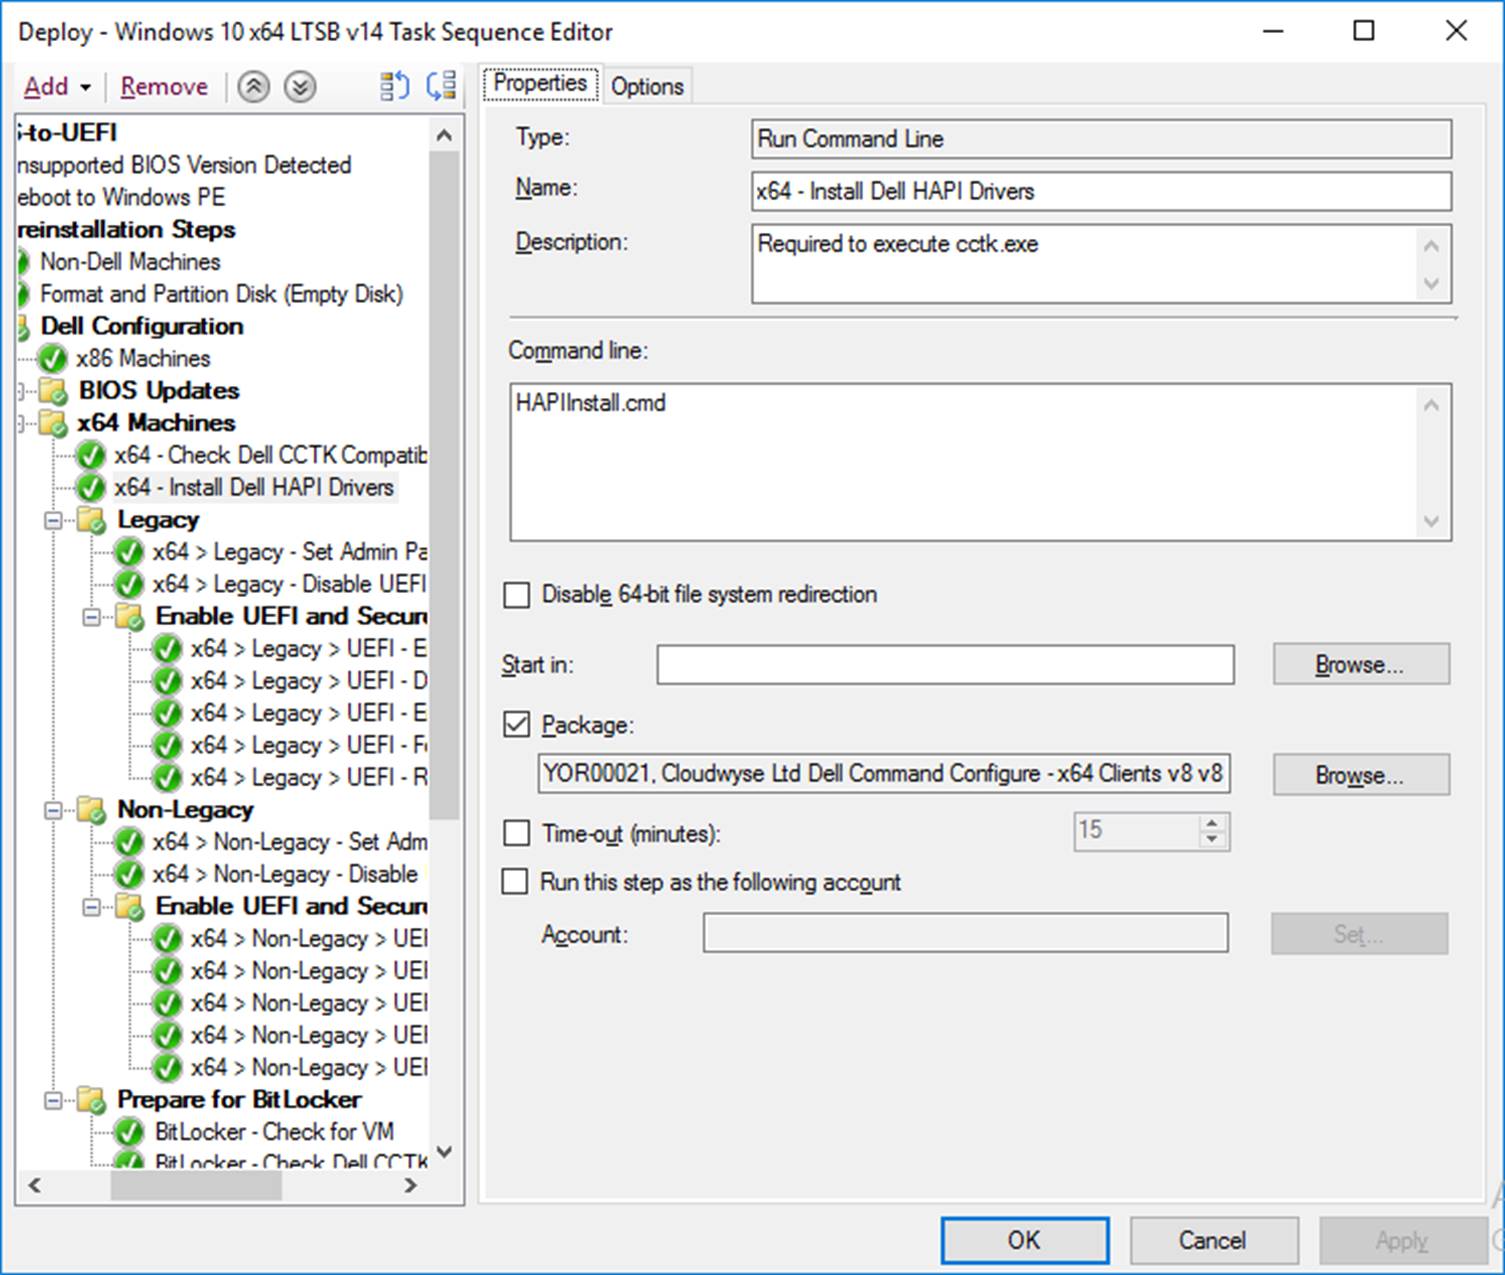
In the next step a short script runs, utilising the IsLegacy variable to determine which version of the WinPE HAPI Driver to install (which is necessary to execute cctk.exe).
|
1 2 3 4 5 6 7 8 9 10 11 |
[cc lang="dos"]@echo off REM Determine Arch IF "%ISLEGACY%" == "TRUE" GOTO :LEGACYTRUE GOTO LEGACYFALSE :LEGACYTRUE legacy\hapi\hapint64.exe -i -k C-C-T-K -p "hapint64.exe" GOTO END :LEGACYFALSE hapi\hapint.exe -i -k C-C-T-K -p "hapint.exe" GOTO END :END[/cc] |
The next group will run is IsLegacy is set to “True” (if it’s false, the Non-Legacy group will run later, which is exactly the same, except it runs the cctk.exe at the root, not the one at legacycctk.exe)

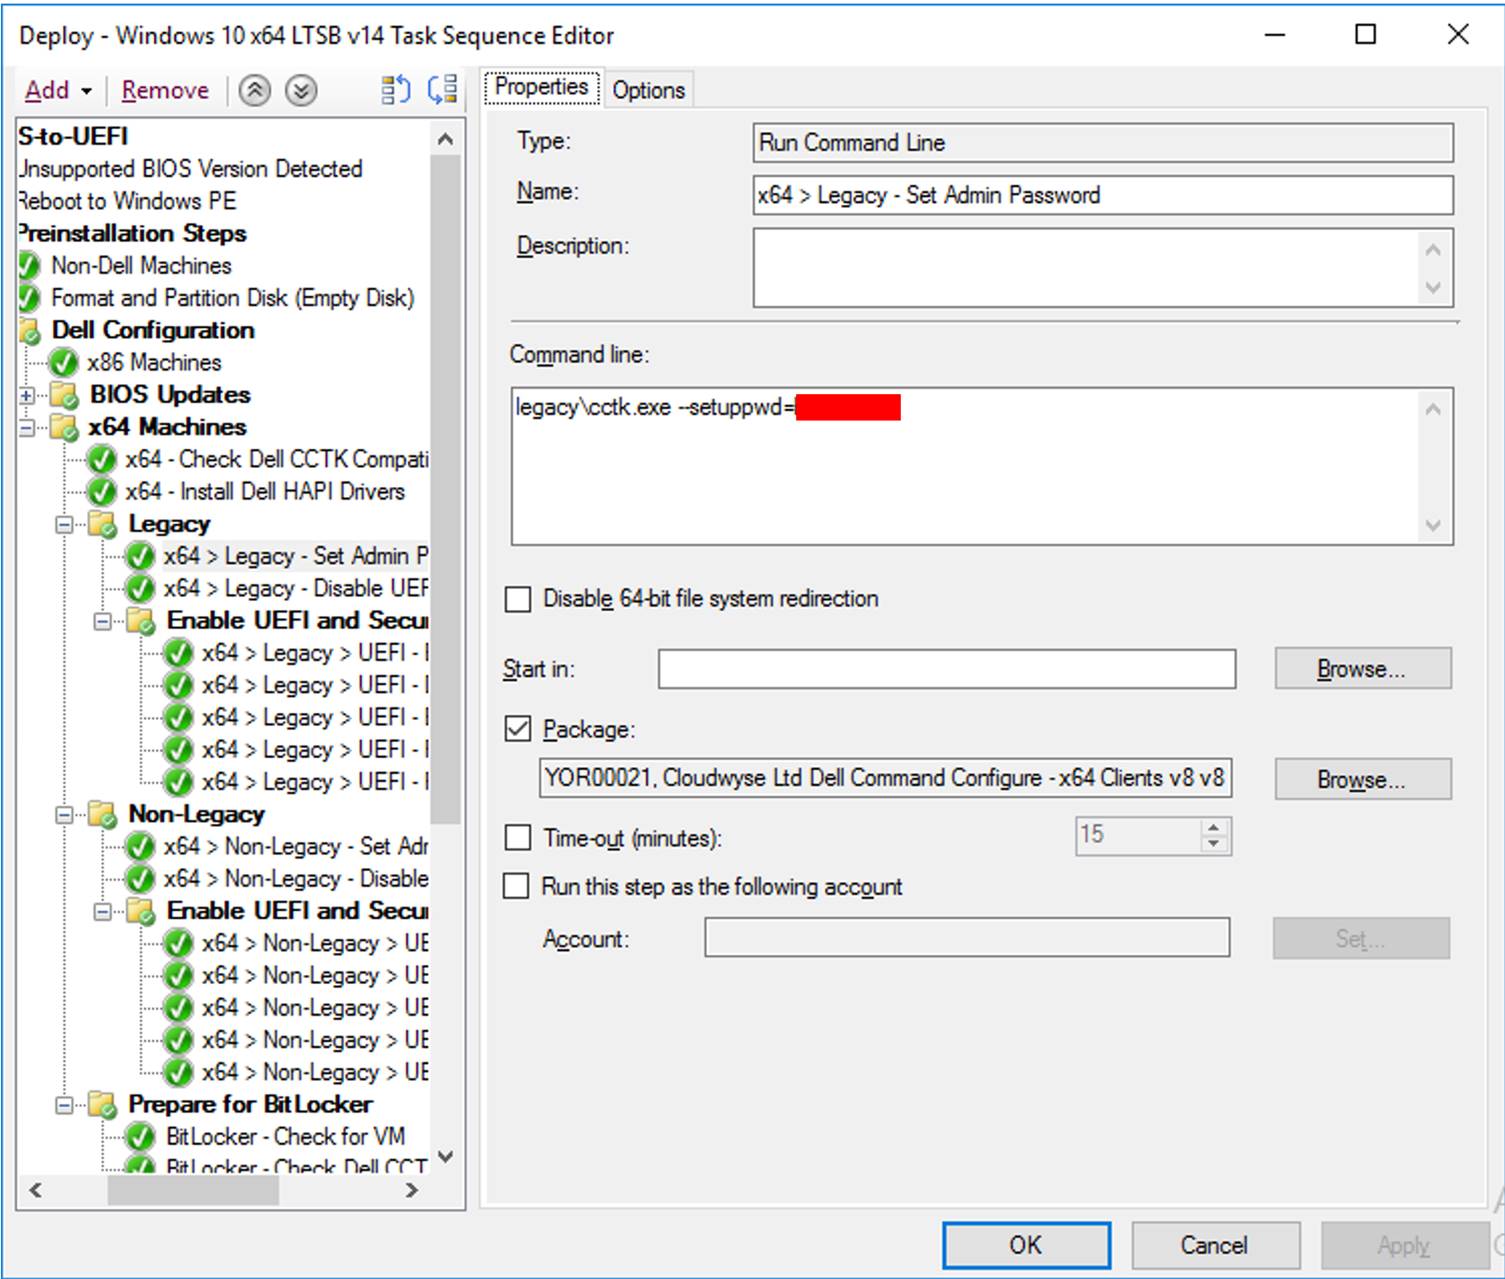
The next step sets the BIOS password. This step is set to ‘Continue on error’ which is what would happen if the BIOS password is already set (in this environment, I know that if there is a password set it will be set to this value).
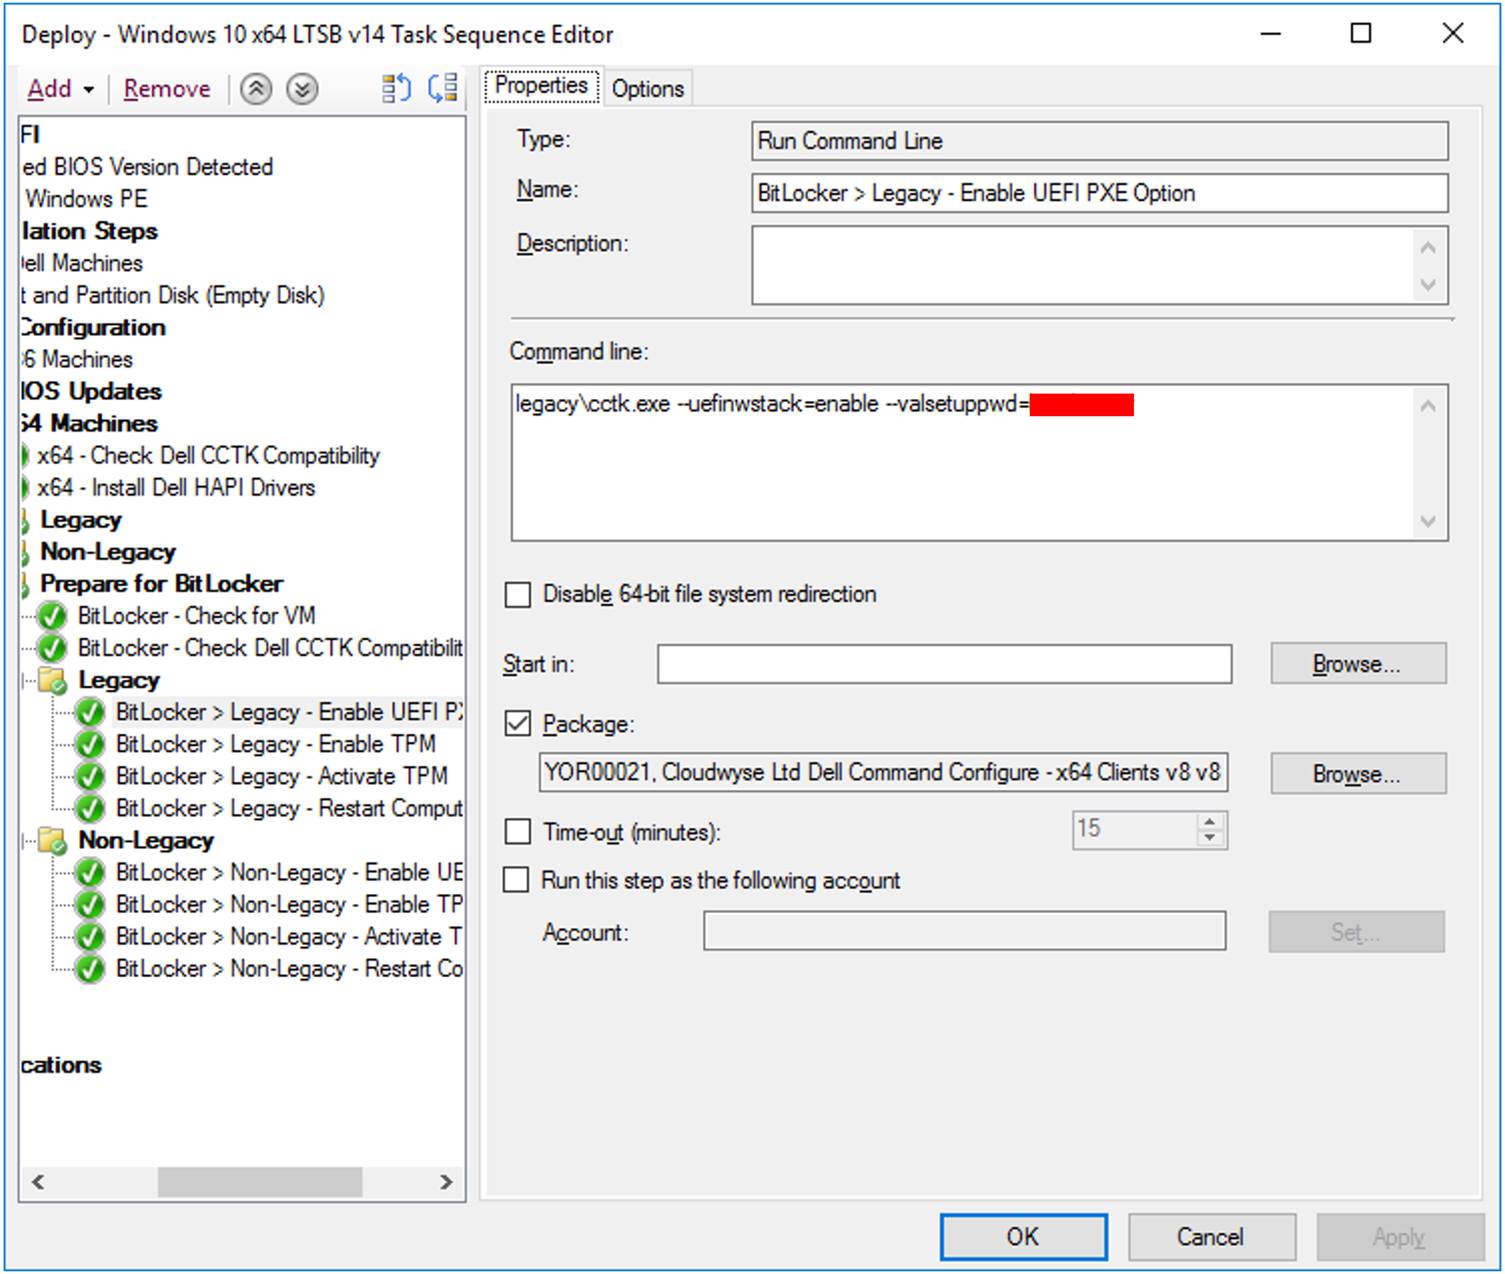
The next step disables the UEFI network stack which is necessary in order to allow the laptop to boot from HDD after the restart. We will re-enable the network stack later.

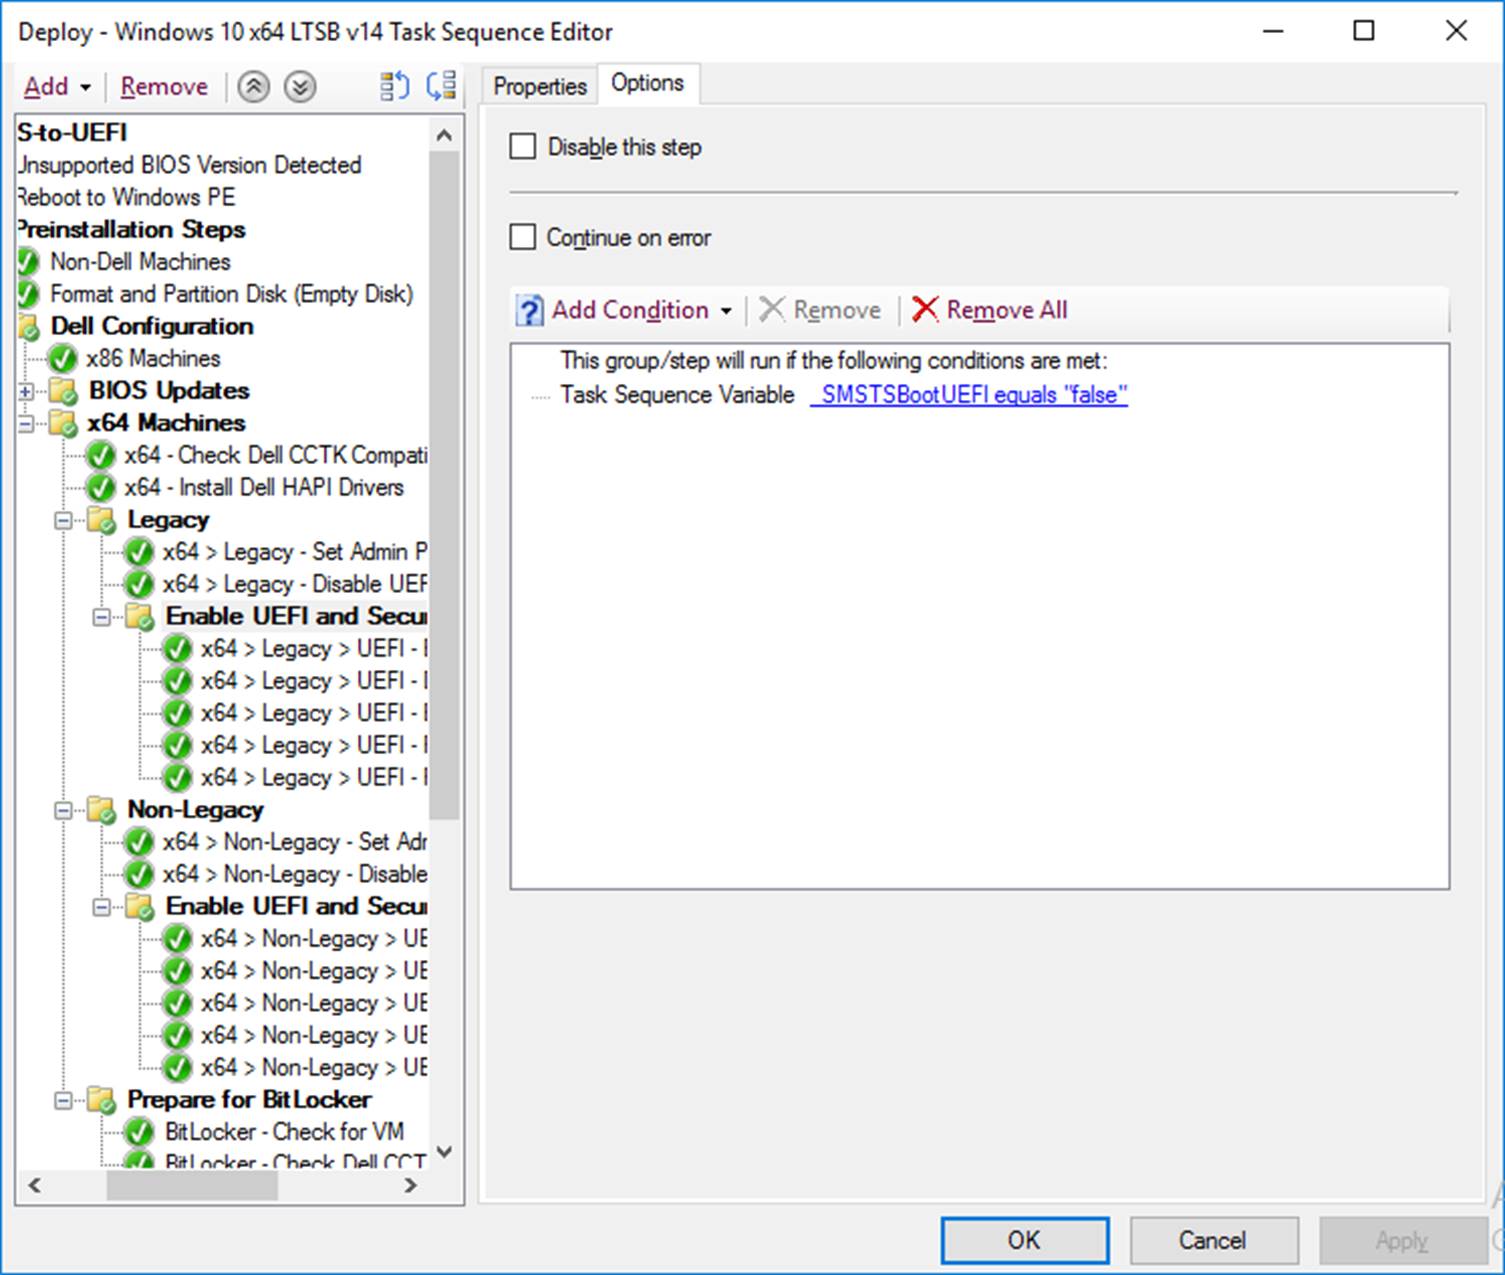
The group runs only if we haven’t booted from UEFI.
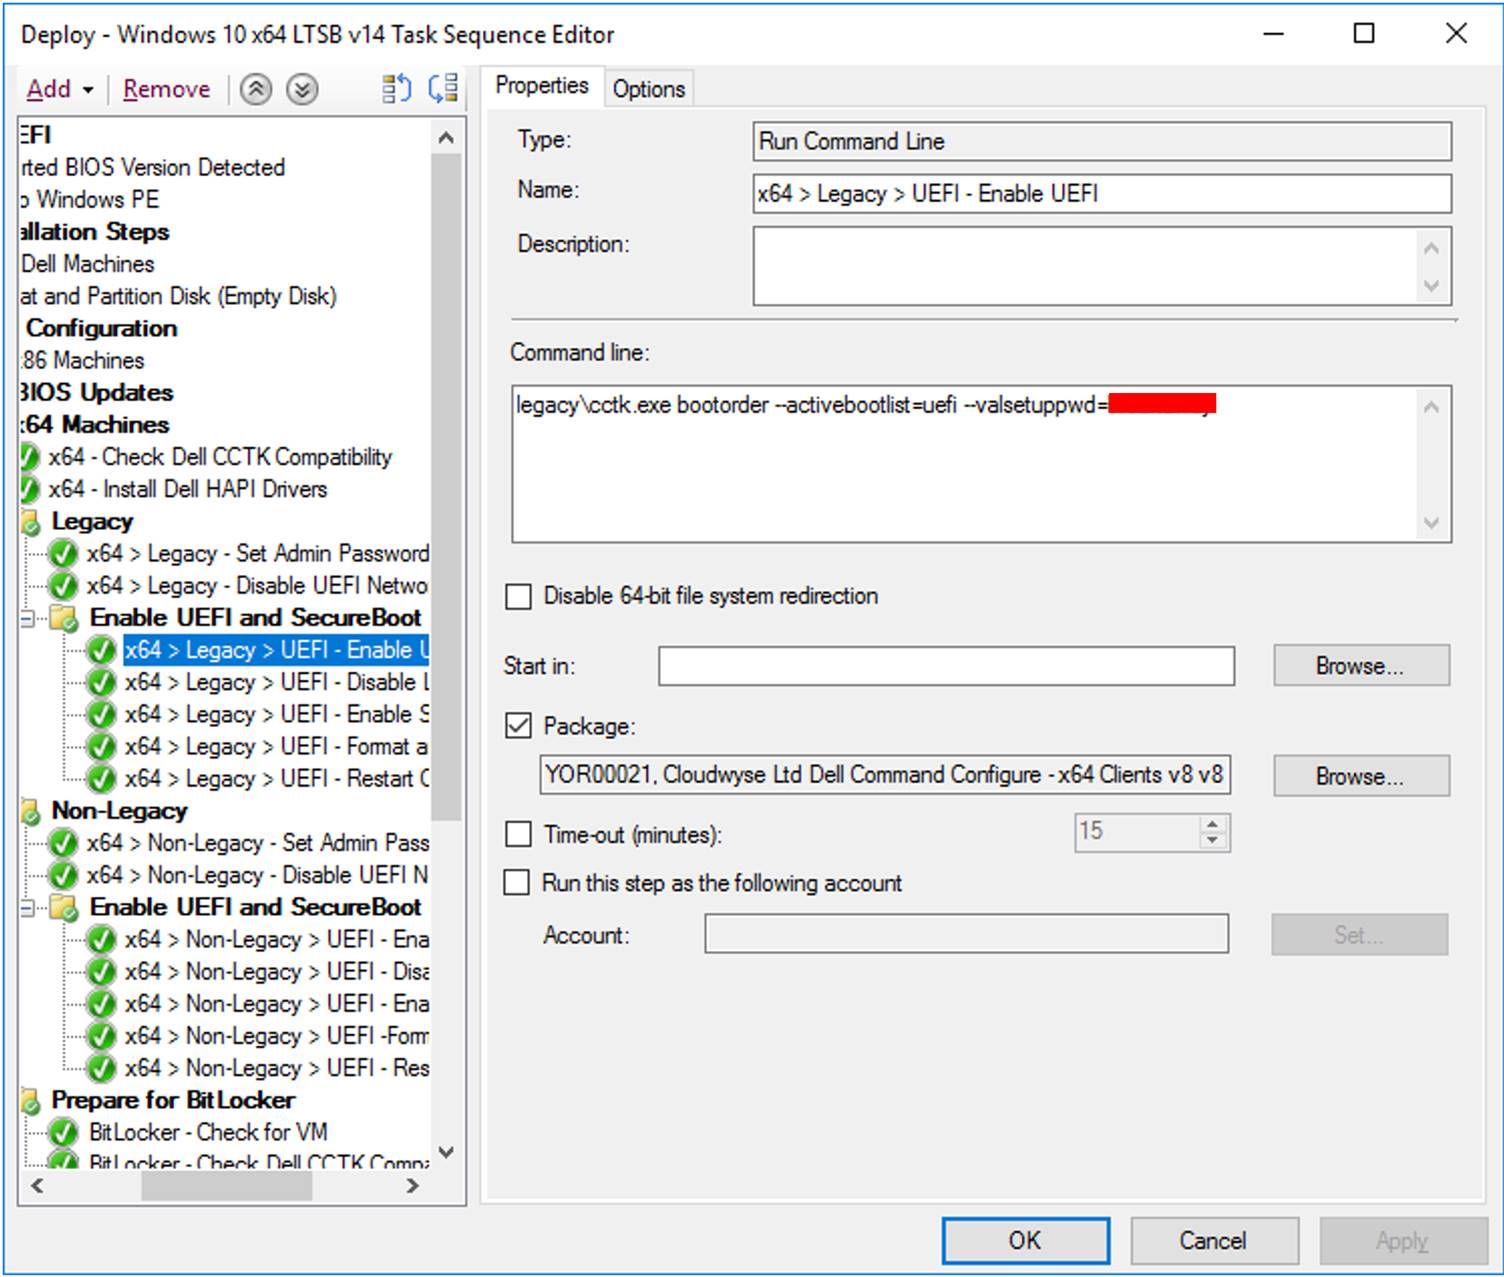
Now we change the bootorder
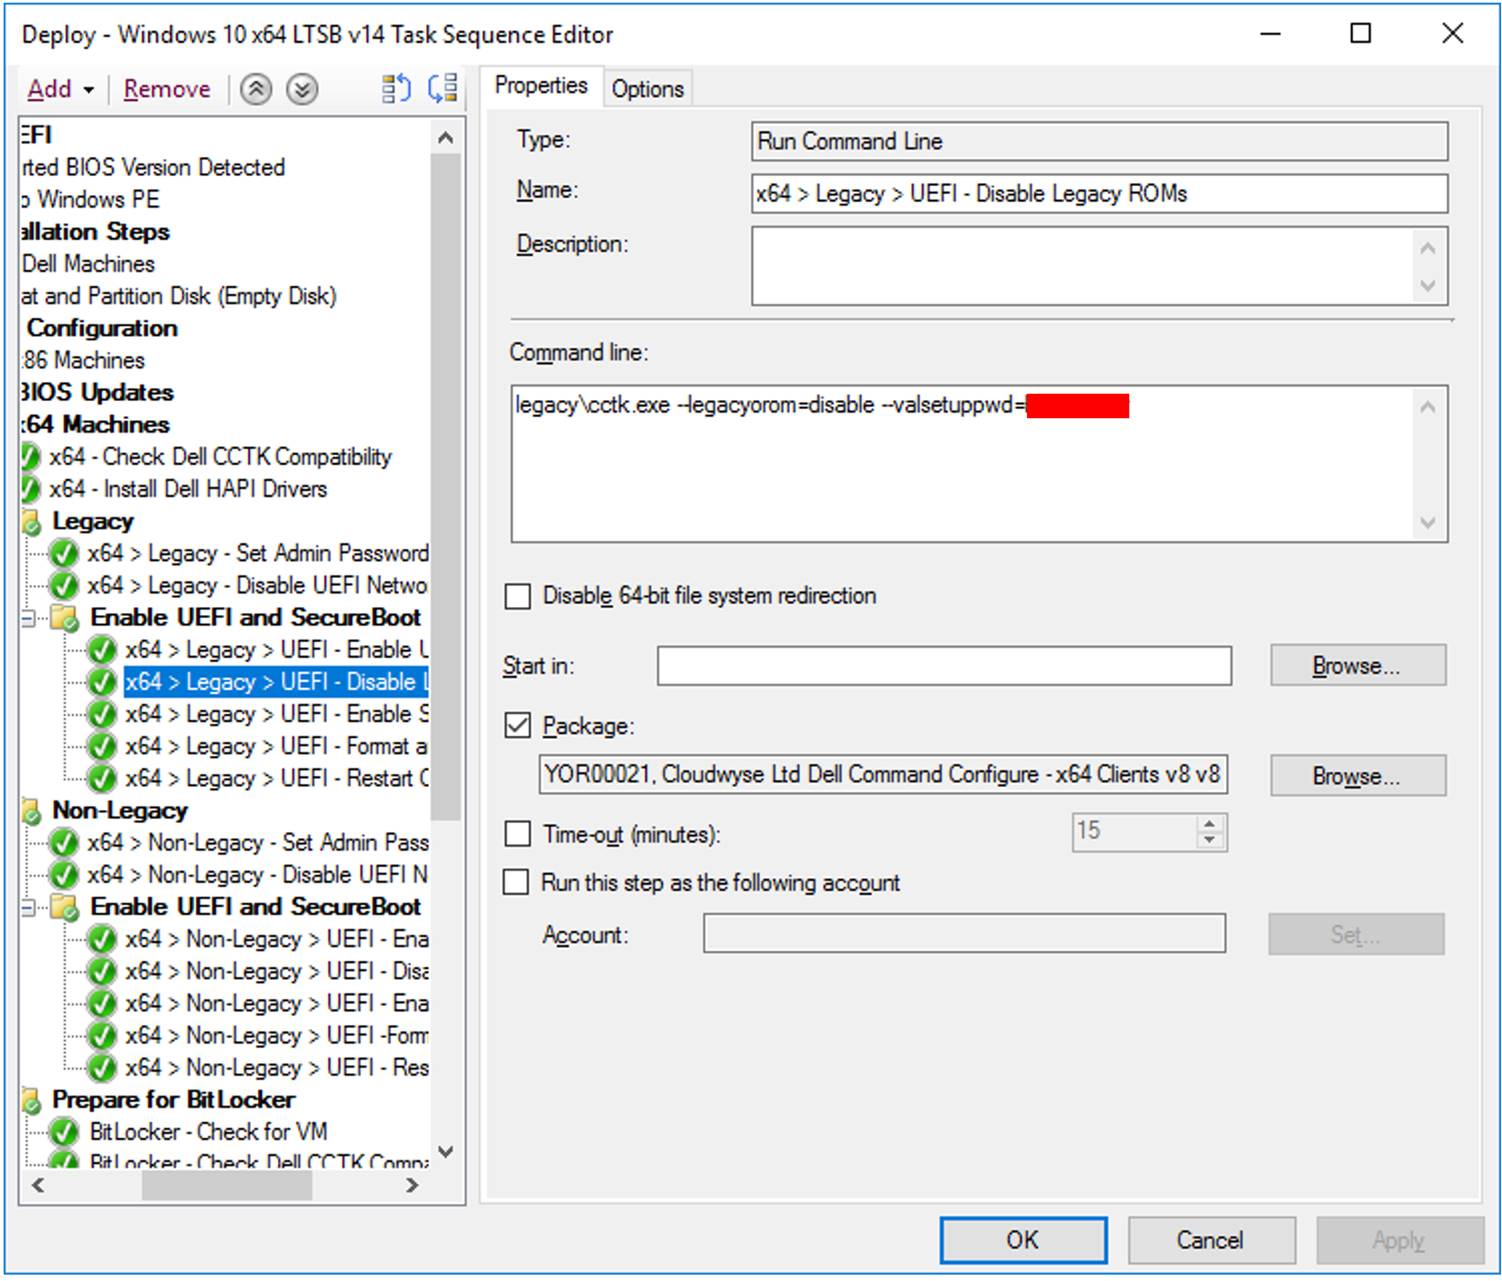
Disable legacy ROMs
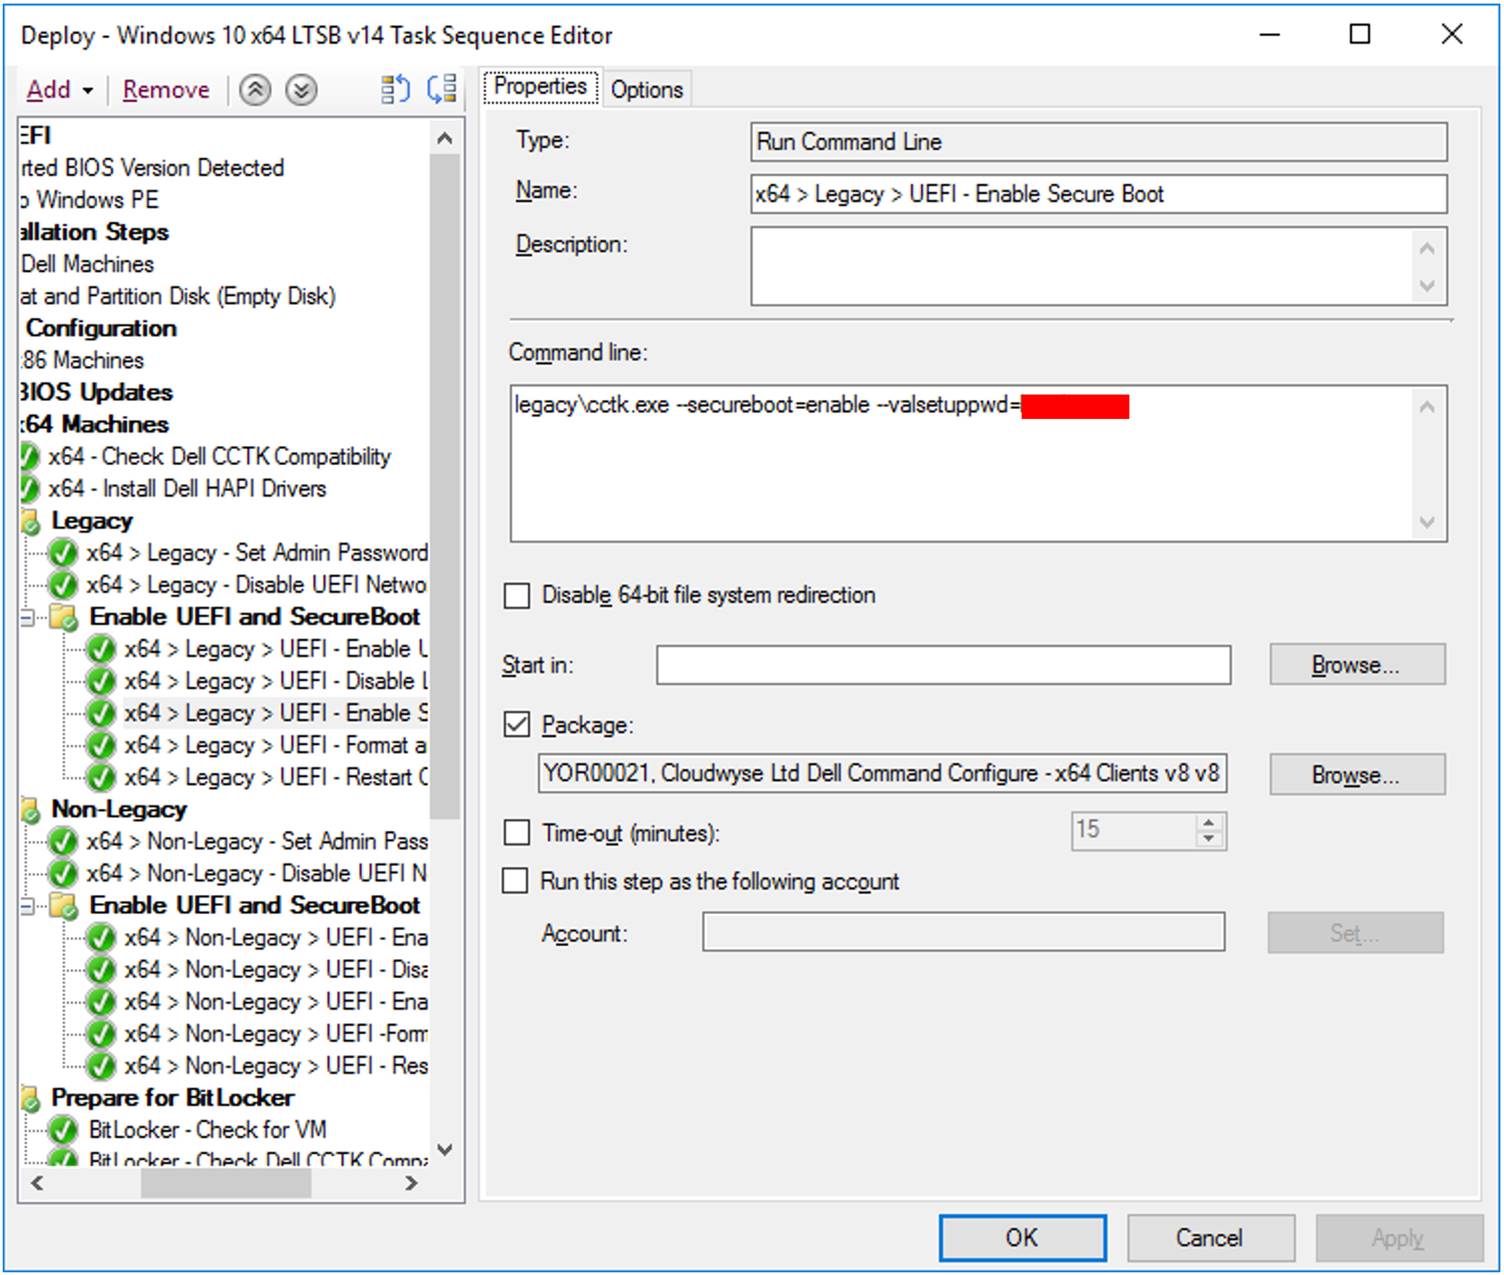
Enable secure boot
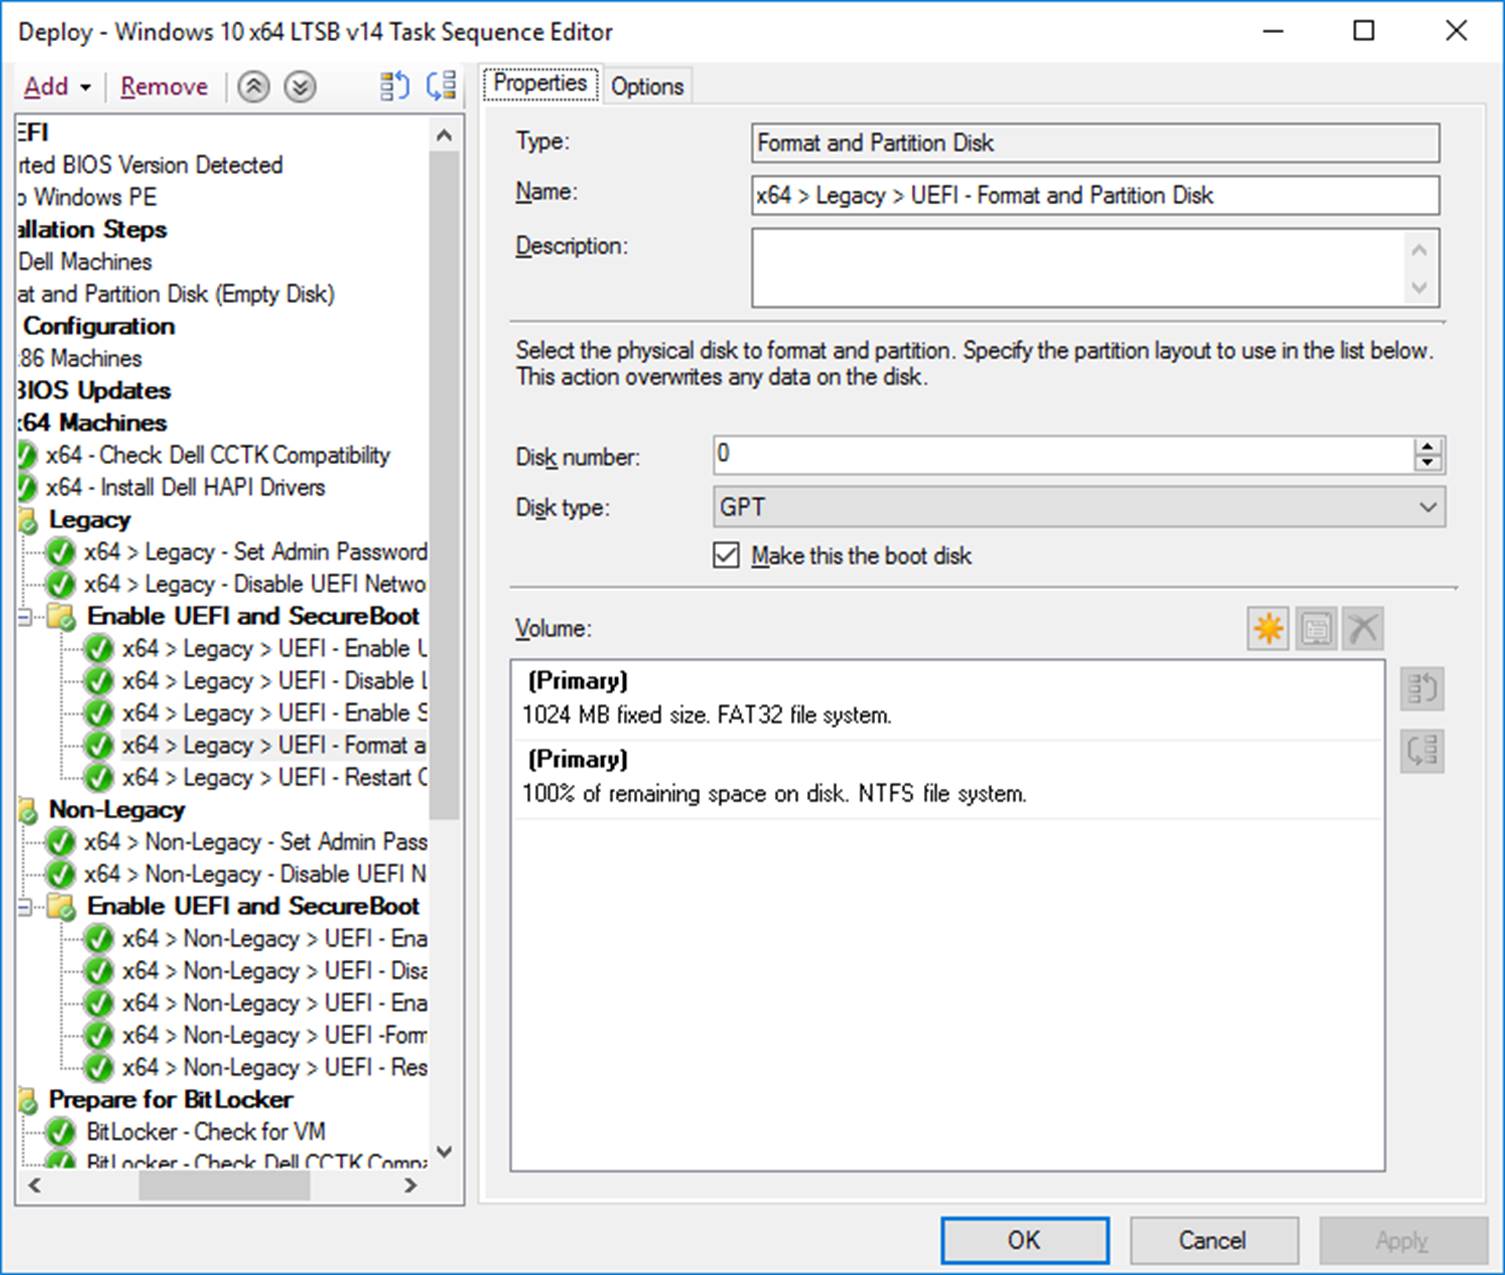
Format as GPT (necessary for Windows 10)
Reboot

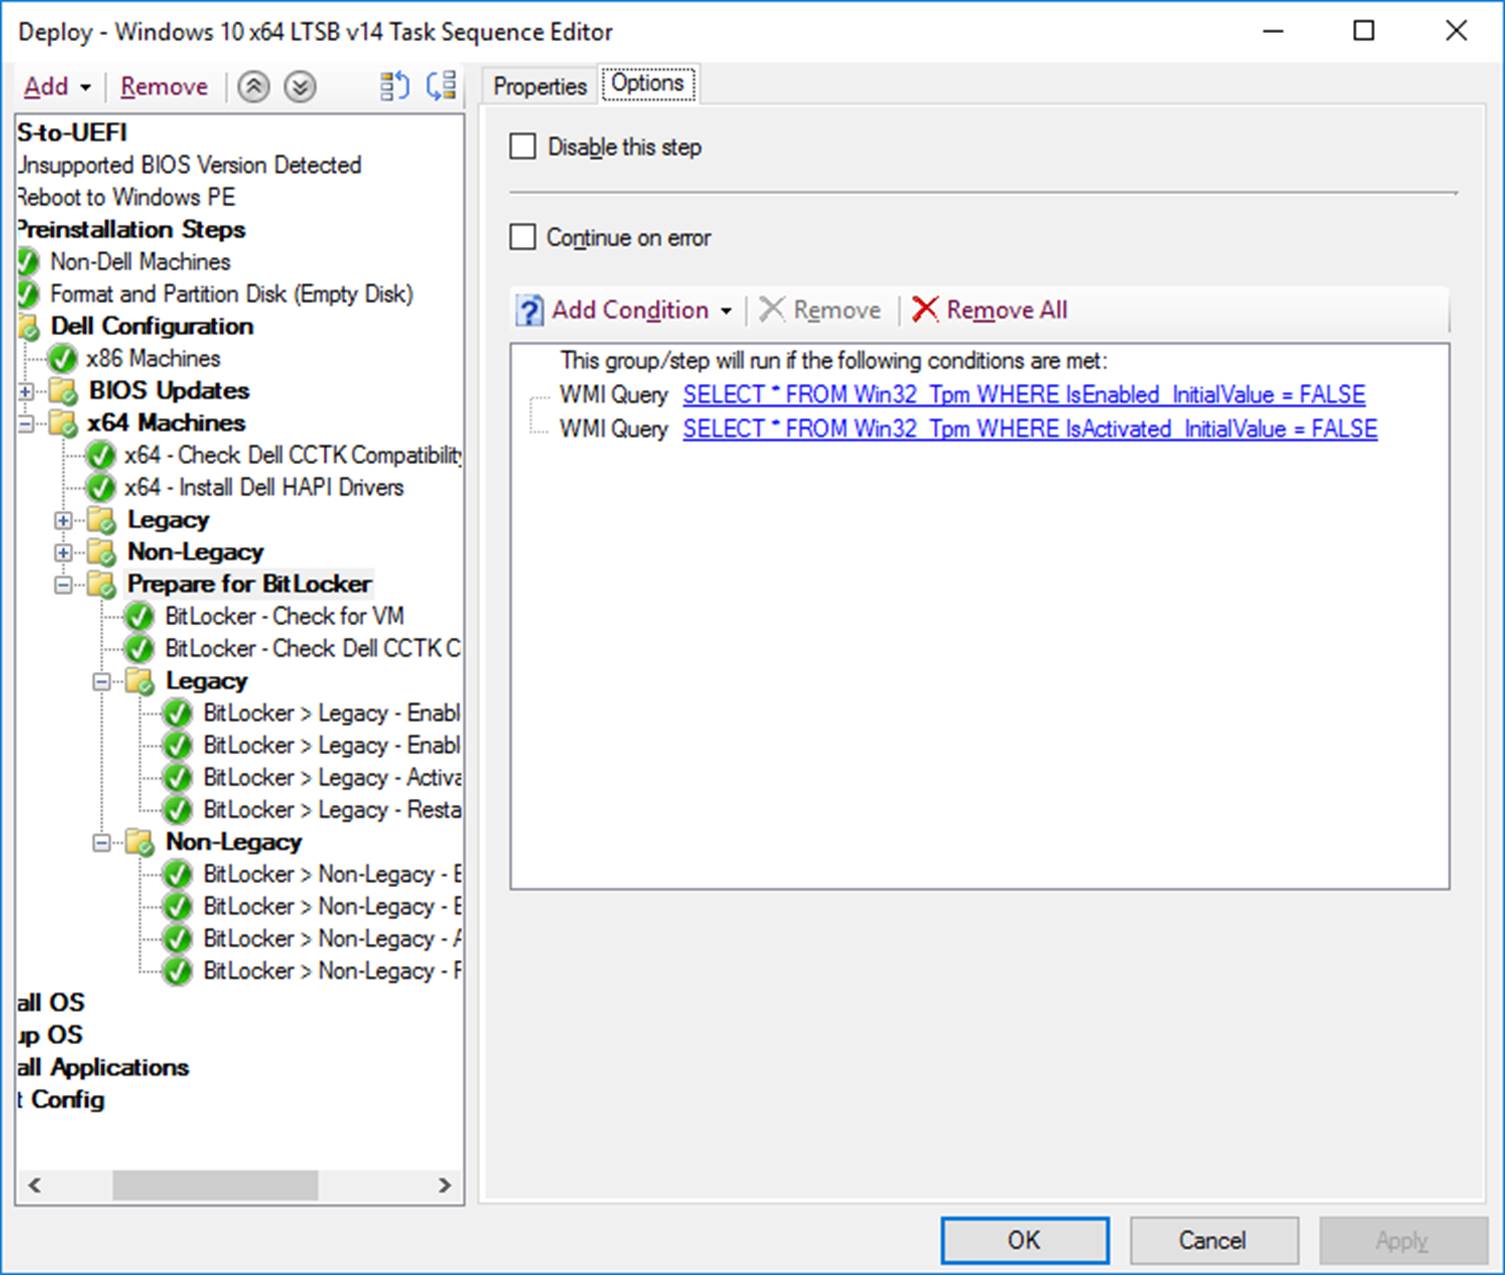
The next group only runs if the TPM is NOT activated and enabled
Next I run a quick powershell script to identify if this is a VM and add it to a TS variable called “PSisVM” (all my VMs are Hyper-V so this would need amending to support VMware). This variable helps later on.
|
1 2 3 4 5 6 7 8 9 10 11 12 13 14 15 16 17 18 19 20 21 22 23 24 25 26 27 28 |
[cc lang="powershell"]#Functions BEGIN { try { $TSEnvironment = New-Object -ComObject Microsoft.SMS.TSEnvironment -ErrorAction Continue } catch [System.Exception] { Write-Warning -Message "Unable to construct Microsoft.SMS.TSEnvironment object"; break } } PROCESS { # Set Logs Directory $LogsDirectory = Join-Path -Path $TSEnvironment.Value("SMSTSLogPath") -ChildPath "" function Write-CMLogEntry { param ( [parameter(Mandatory = $true, HelpMessage = "Value added to the log file.")] [ValidateNotNullOrEmpty()] [string]$Value, [parameter(Mandatory = $true, HelpMessage = "Severity for the log entry. 1 for Informational, 2 for Warning and 3 for Error.")] [ValidateNotNullOrEmpty()] [ValidateSet("1", "2", "3")] [string]$Severity, [parameter(Mandatory = $false, HelpMessage = "Name of the log file that the entry will written to.")] [ValidateNotNullOrEmpty()] [string]$FileName = "CheckVM.log" ) # Determine log file location $LogFilePath = Join-Path -Path $LogsDirectory -ChildPath $FileName # Construct time stamp for log entry $Time = -join @((Get-Date -Format "HH:mm:ss.fff"), "+", (Get-WmiObject -Class Win32_TimeZone | Select-Object -ExpandProperty Bias)) # Construct date for log entry $Date = (Get-Date -Format "MM-dd-yyyy") # Construct context for log entry $Context = $([System.Security.Principal.WindowsIdentity]::GetCurrent().Name) # Construct final log entry $LogText = "" # Add value to log file try { Out-File -InputObject $LogText -Append -NoClobber -Encoding Default -FilePath $LogFilePath -ErrorAction Stop } catch [System.Exception] { Write-Warning -Message "Unable to append log entry to CheckVM.log file. Error message at line $($.InvocationInfo.ScriptLineNumber): $($_.Exception.Message)" } } Write-CMLogEntry -Value "Checking if this is a virtual machine" -Severity 1 $sysMan = (Get-wmiobject -query "Select Manufacturer from Win32_SystemEnclosure") | select-object -expand Manufacturer Write-CMLogEntry -Value "Query returned $sysMan" -Severity 1 IF($sysMan -like "<em>Microsoft</em>") { $PSisVM = "True" Write-CMLogEntry -Value "Virtual machine detected." -Severity 2 } ELSE { $PSisVM = "False" Write-CMLogEntry -Value "Physical machine detected" -Severity 1 } $TSEnvironment.Value("PSisVM") = $PSisVM Write-CMLogEntry -Value "PSisVM task sequence variable has been set to $PSisVM" -Severity 2 }[/cc] |
Next I run the Dell CCTK check again (we rebooted since the last time) and filter my legacy/non-legacy groups as before.

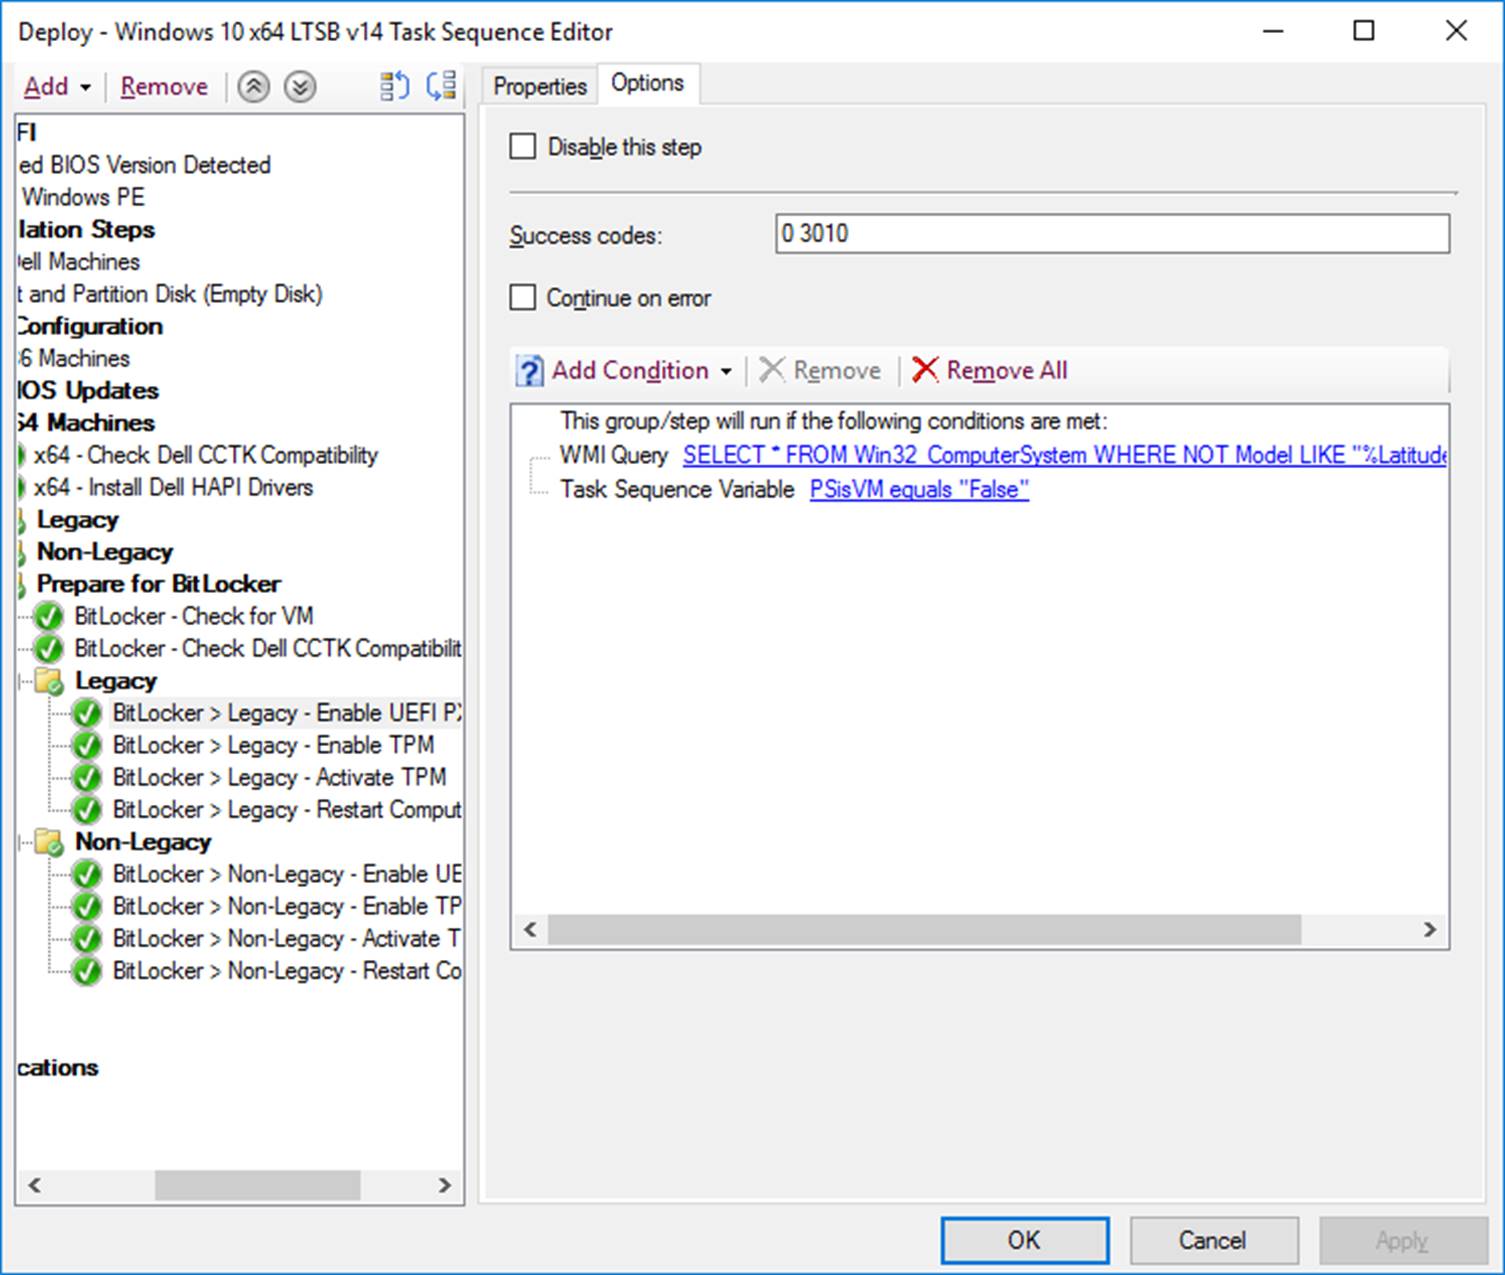
Next we enable UEFI PXE option (only if PSisVM is False… I’ve also filtered out a certain laptop model here).
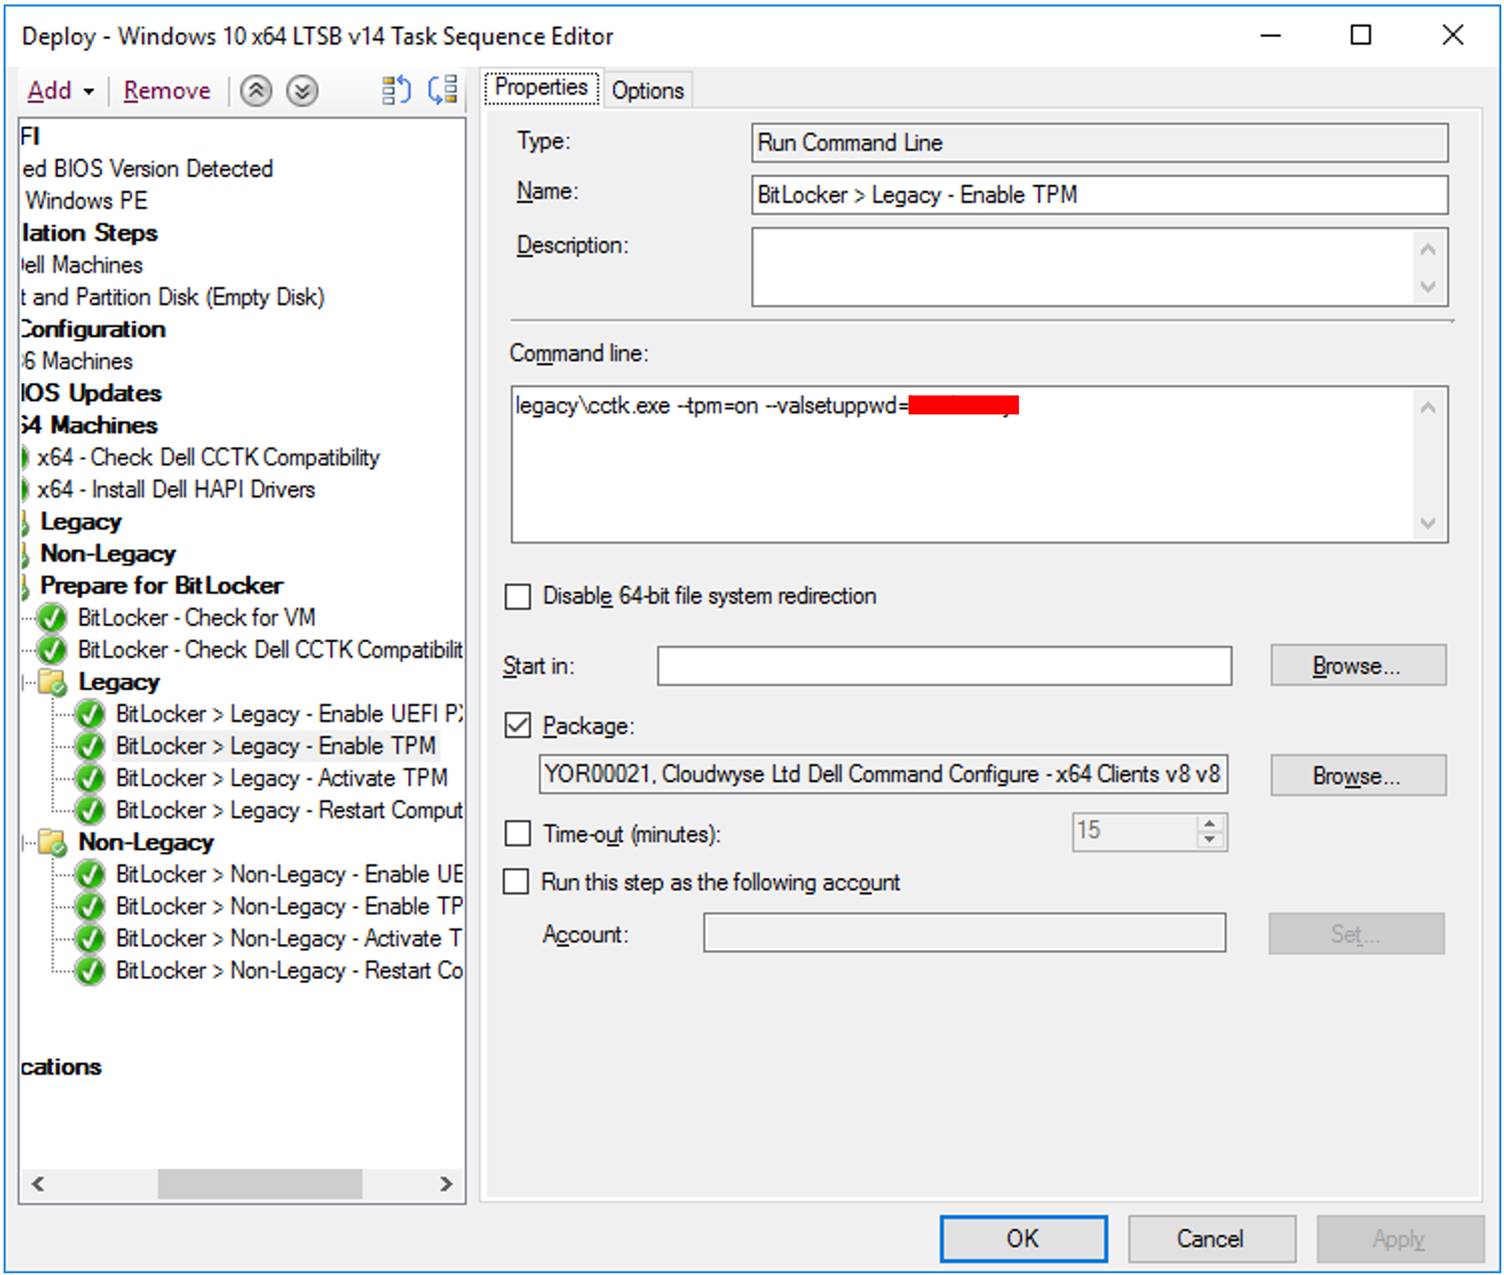
Enable TPM (again – there is a WMI query filter where PSisVM = False)
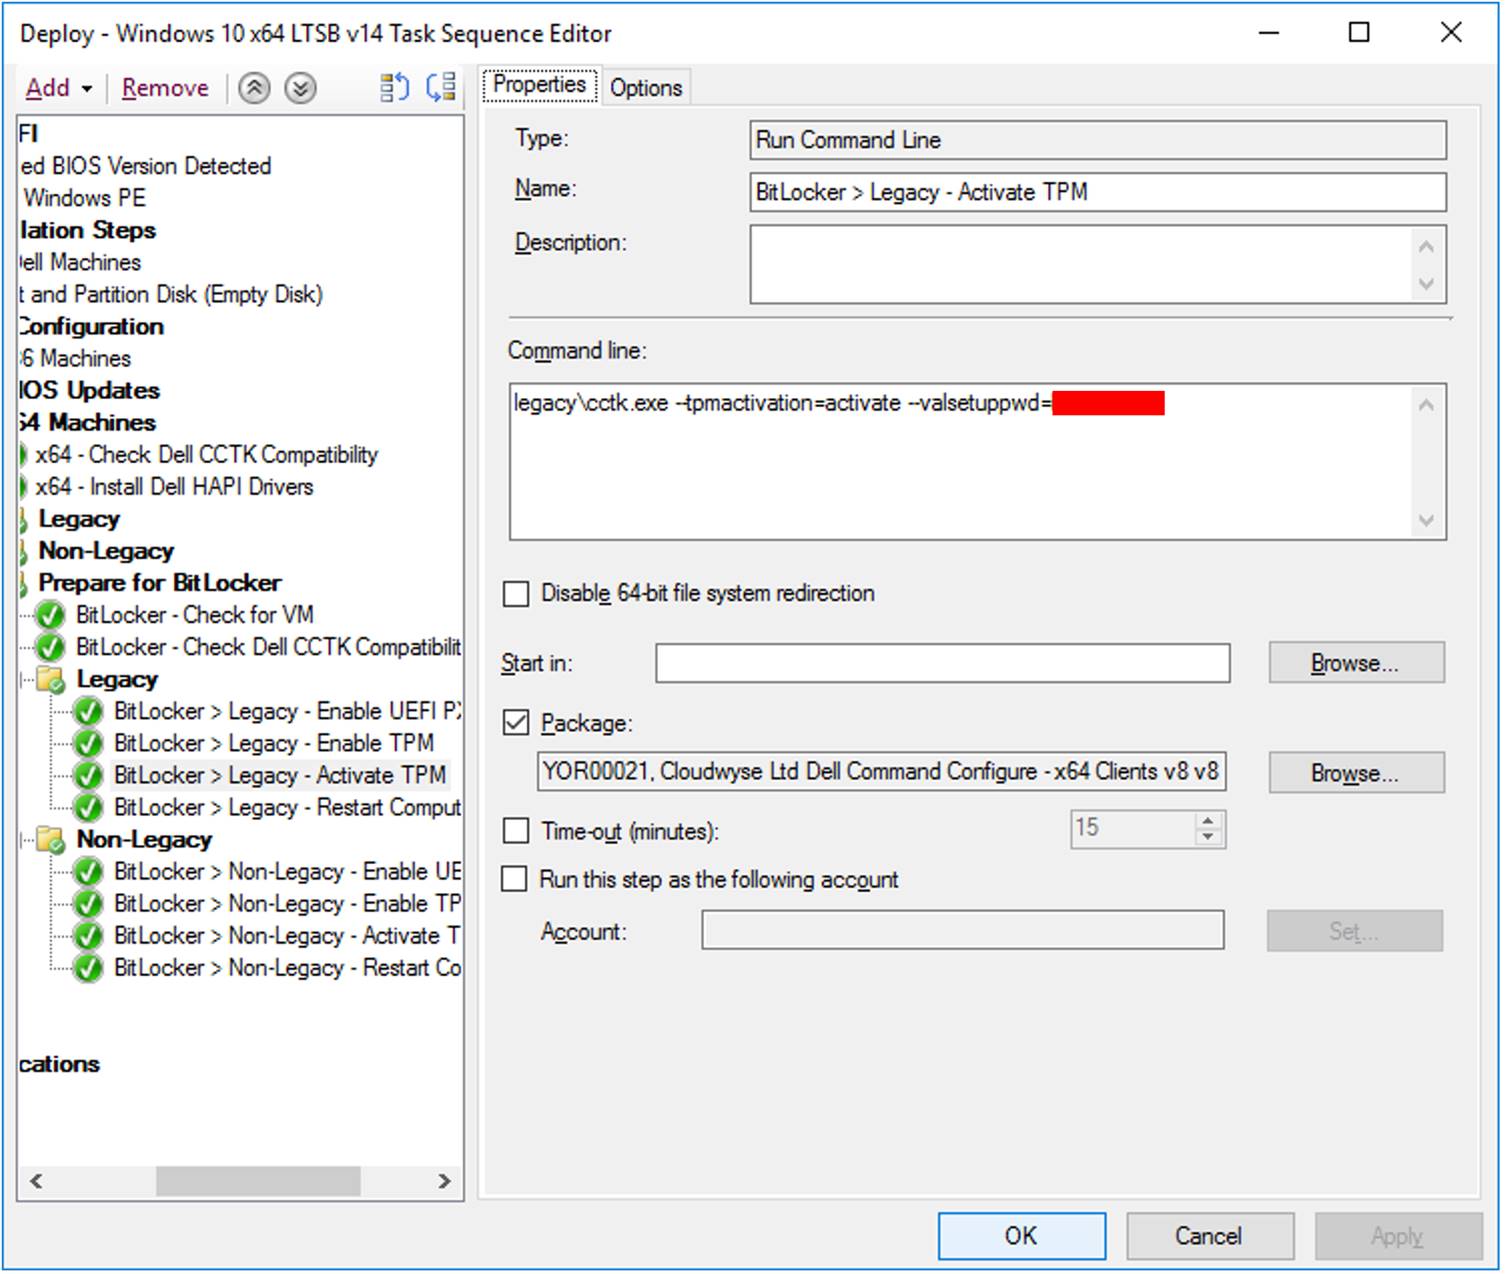
Activate TPM (PSisVM = False)
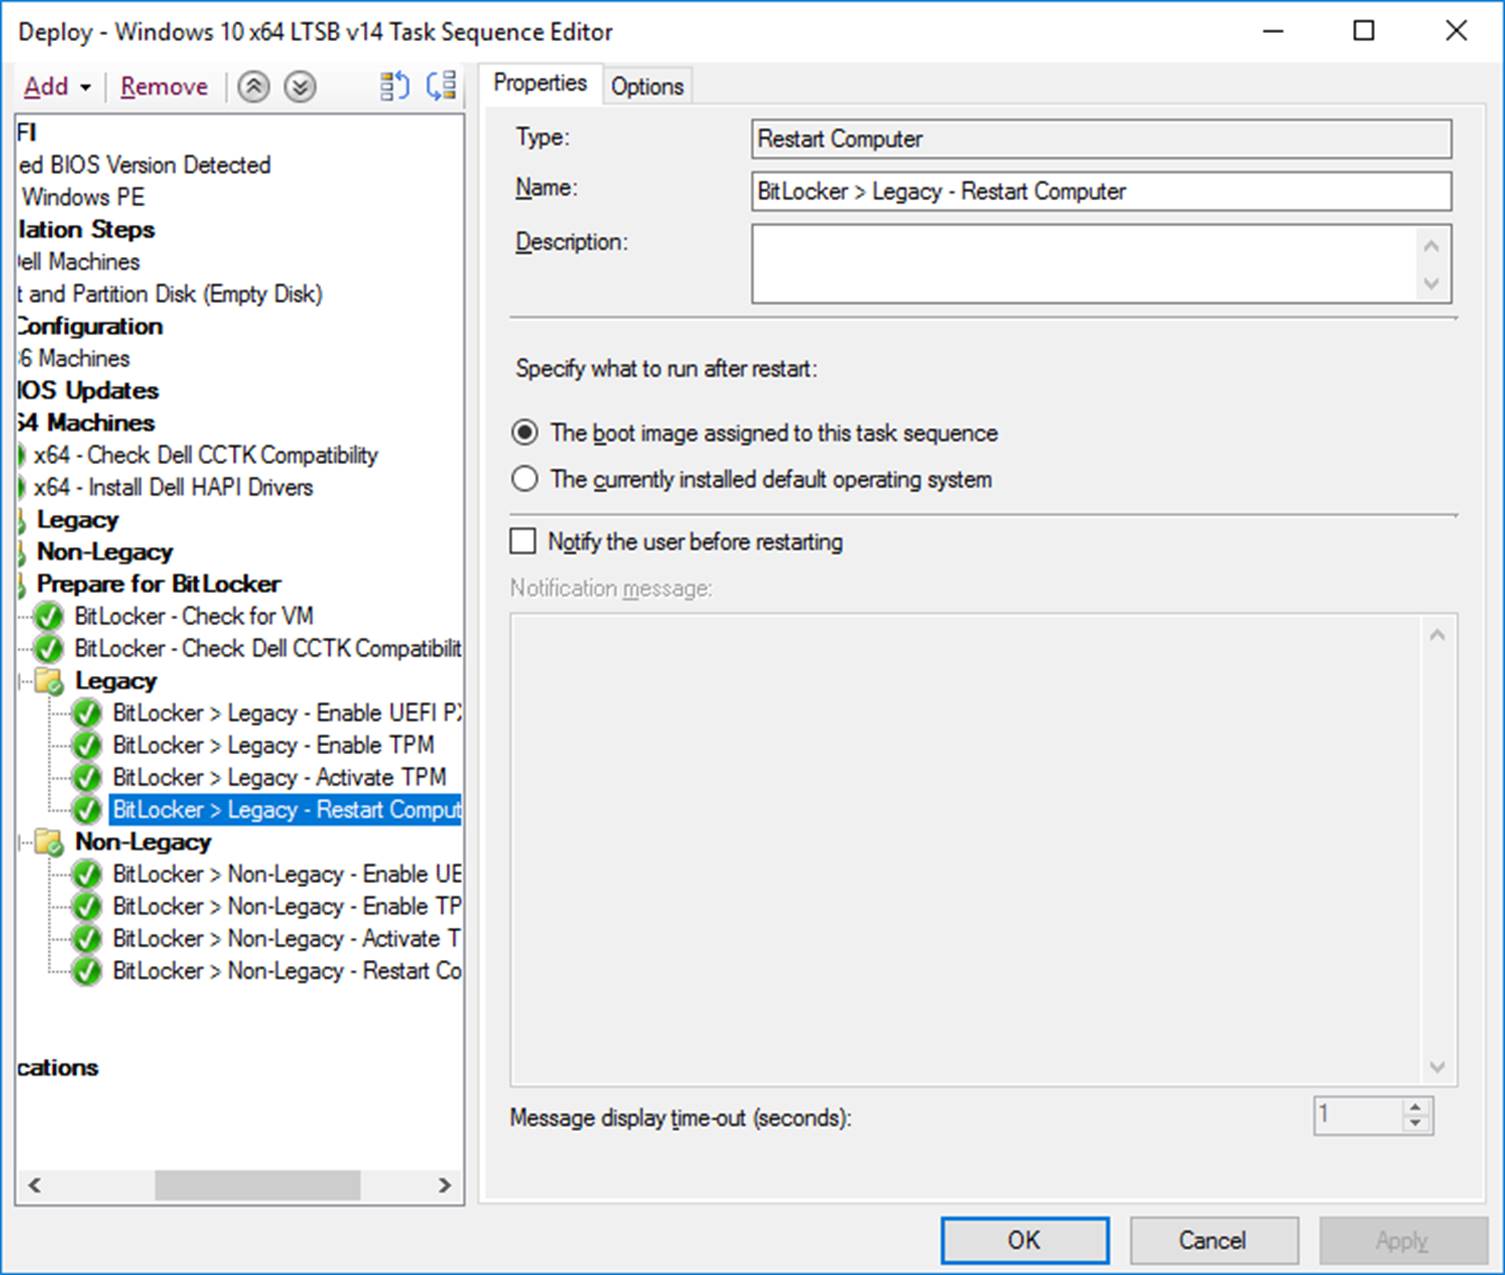
Reboot
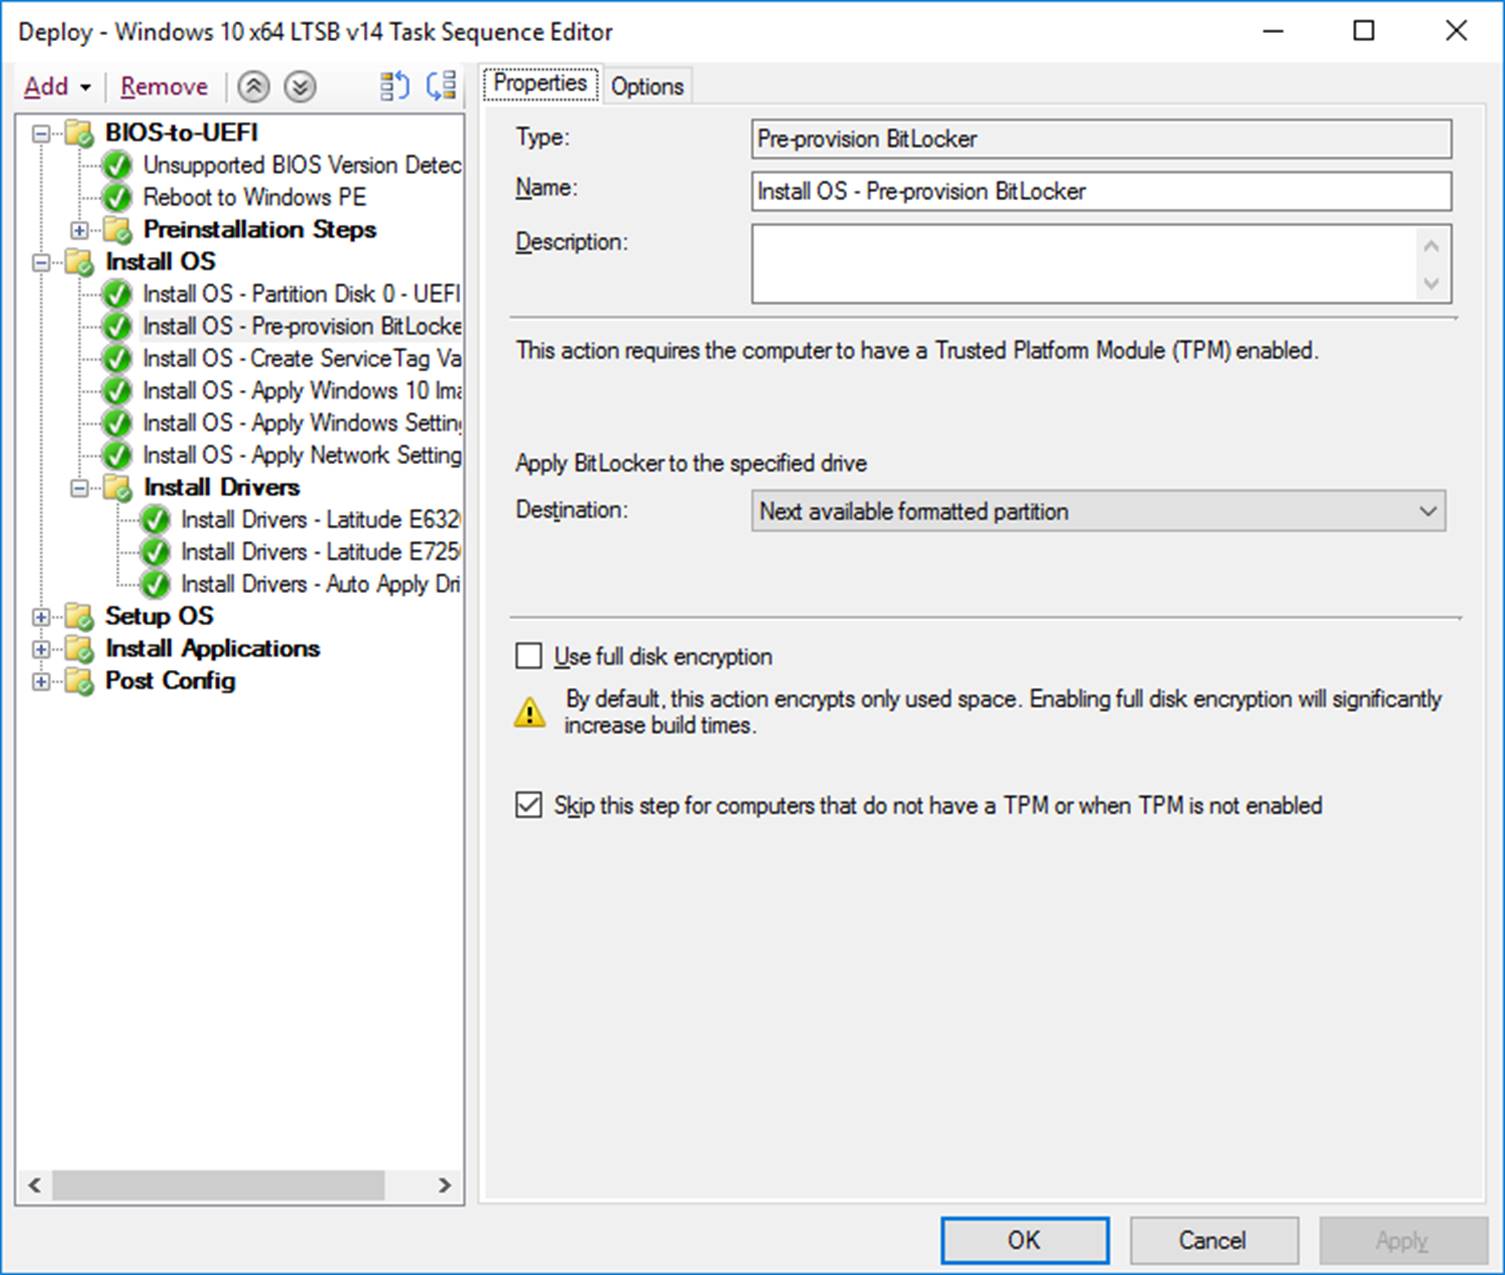
Next we create our final partitions with following conditions


Pre-provision BitLocker
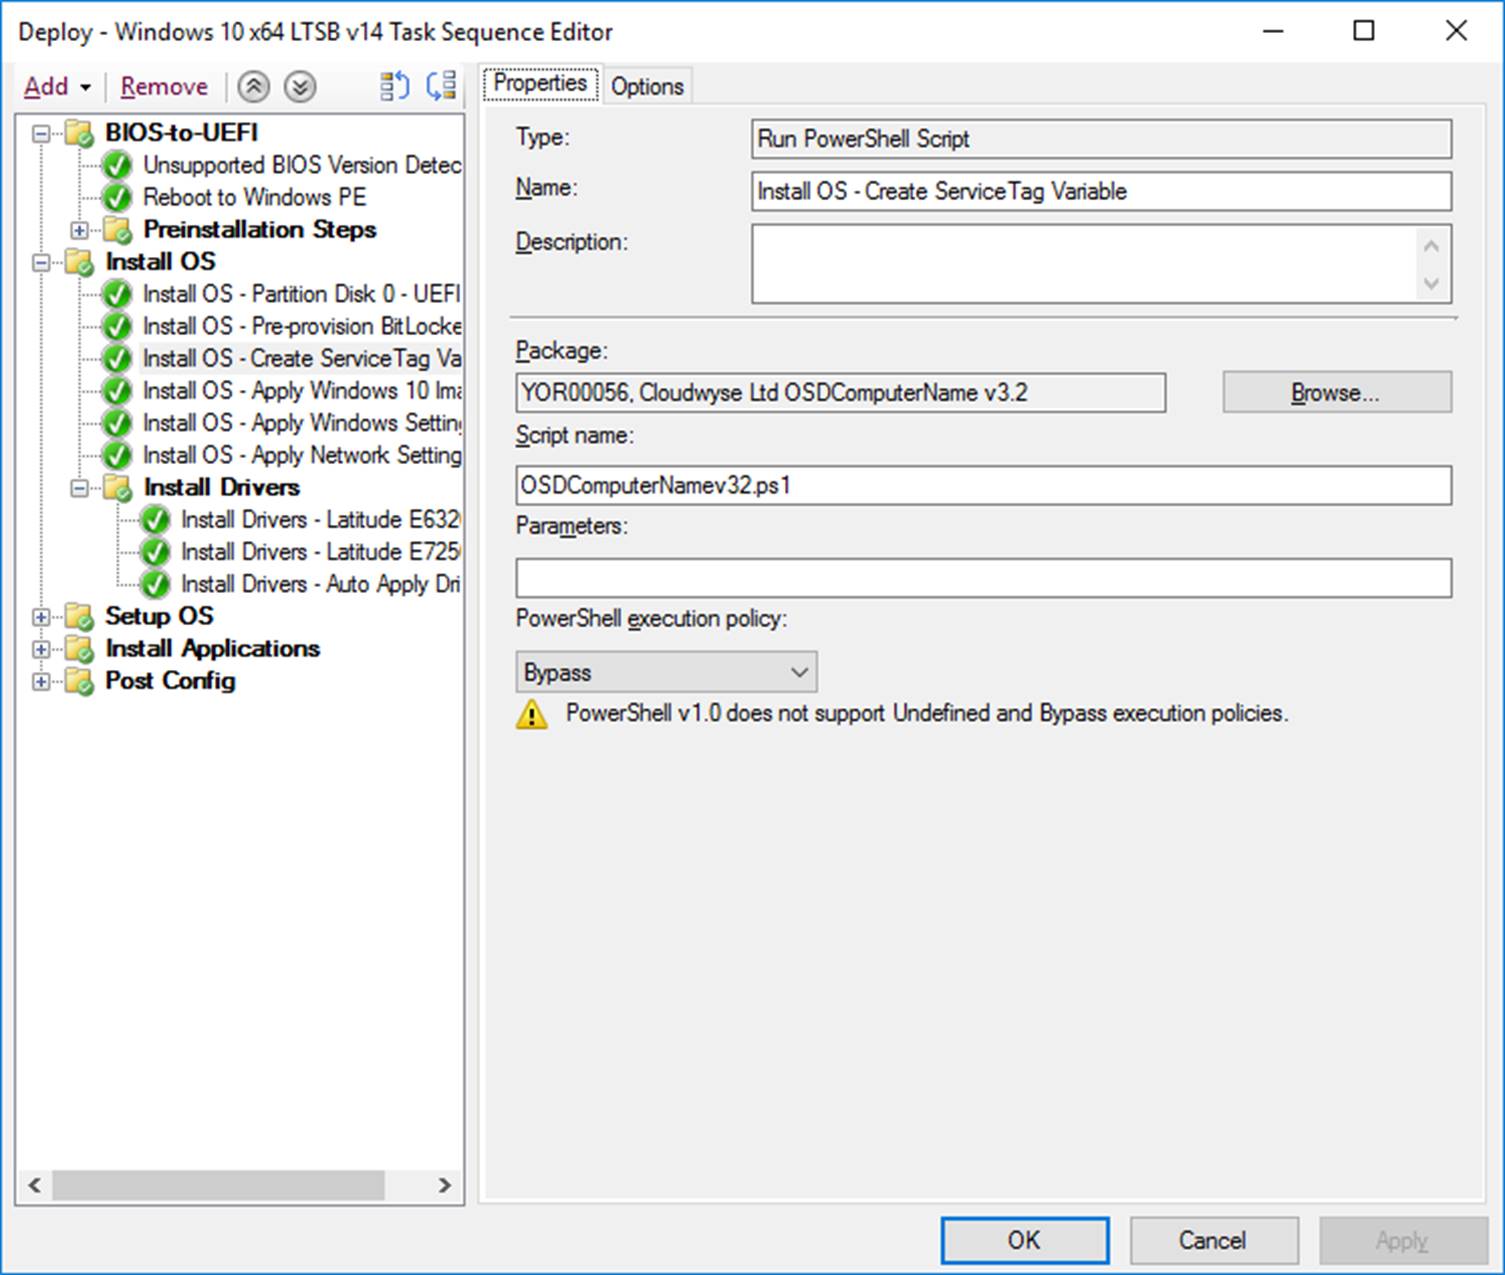
Next I use a script to name my computers as I want them named. This script is documented here so I’m not going to repeat the detail.
Apply the OS image (the unattend.xml just contains regional settings – happy to share if anyone needs it).

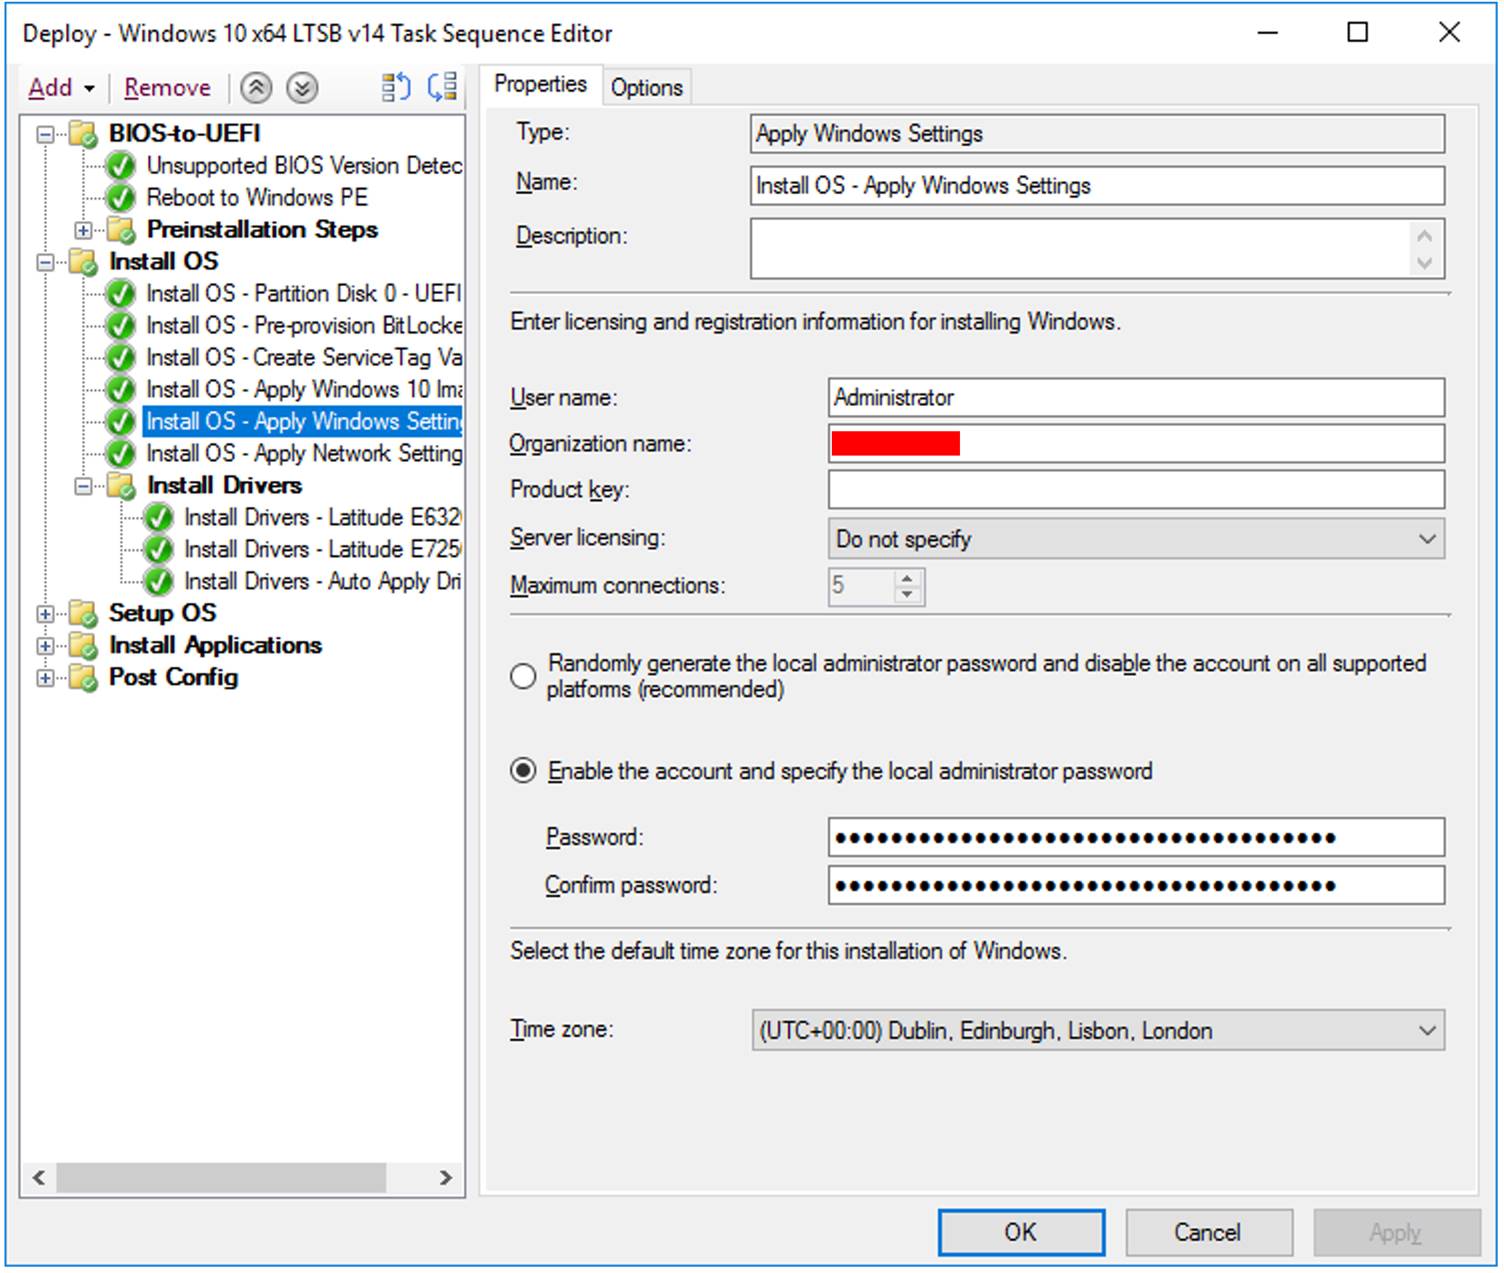
Apply Windows settings
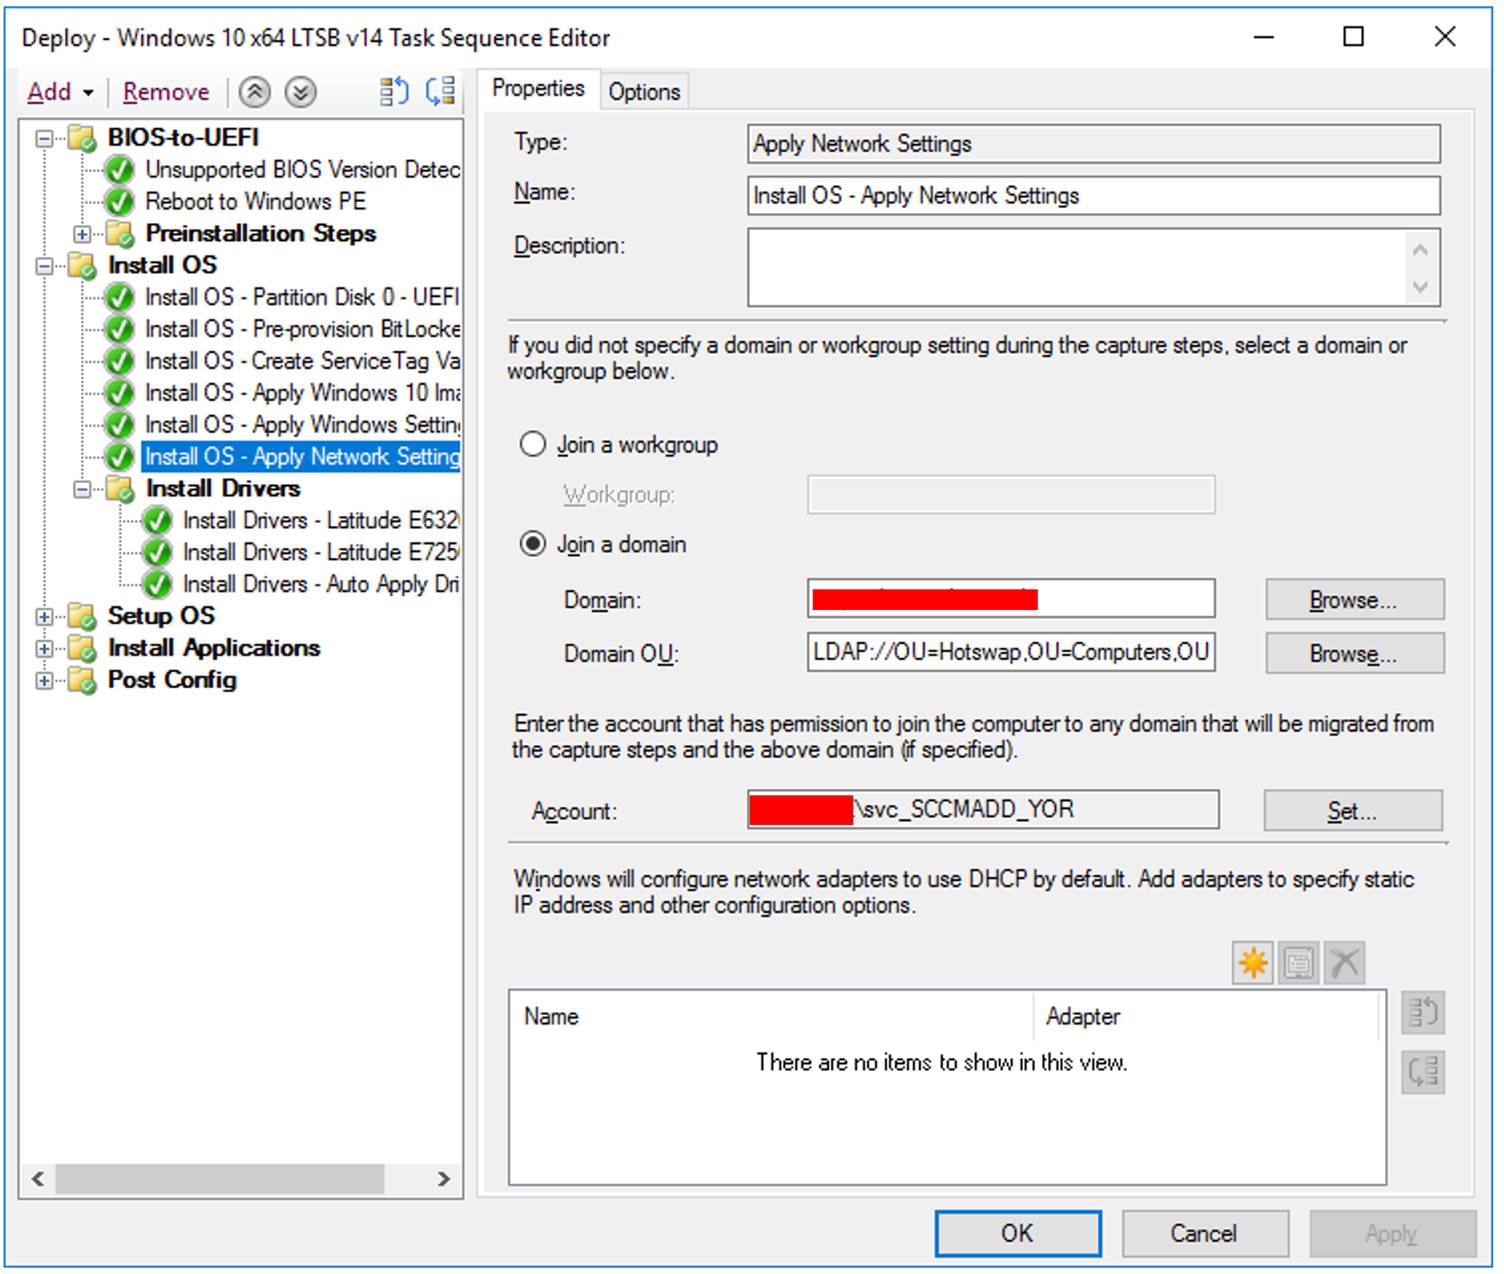
Apply Network settings
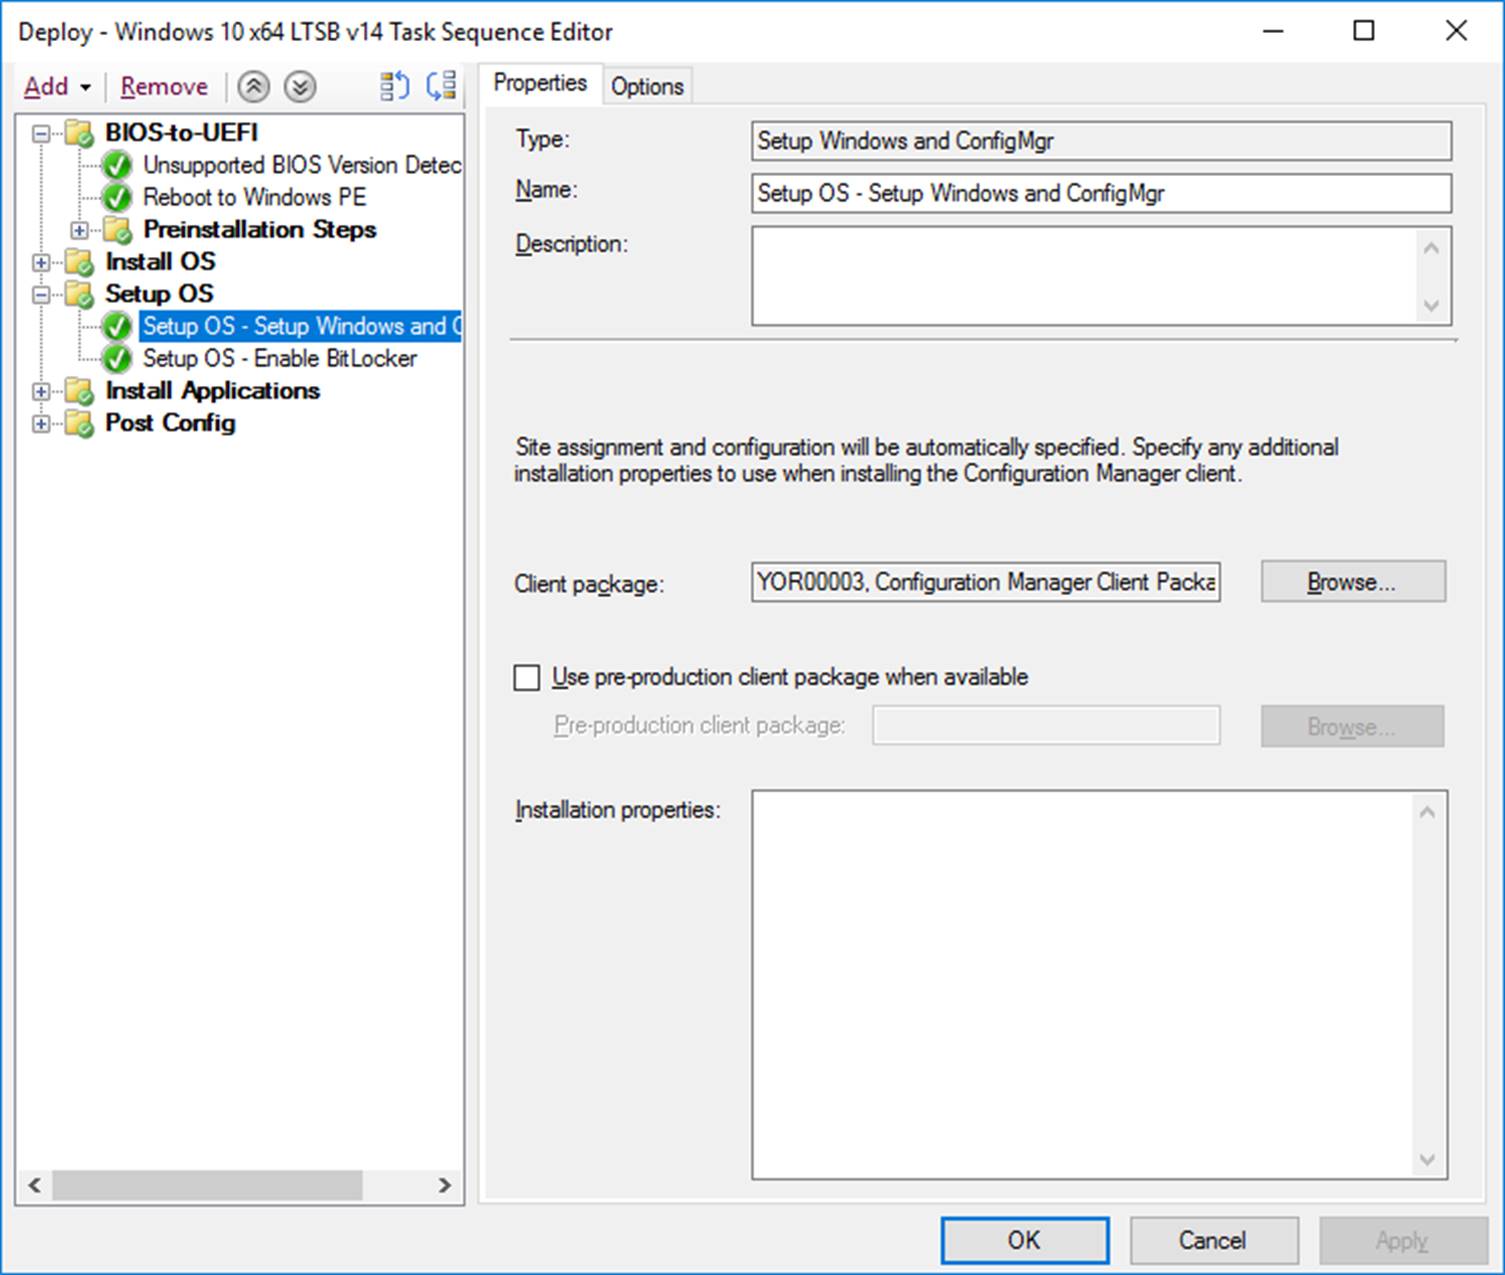
Finally install the configmgr client
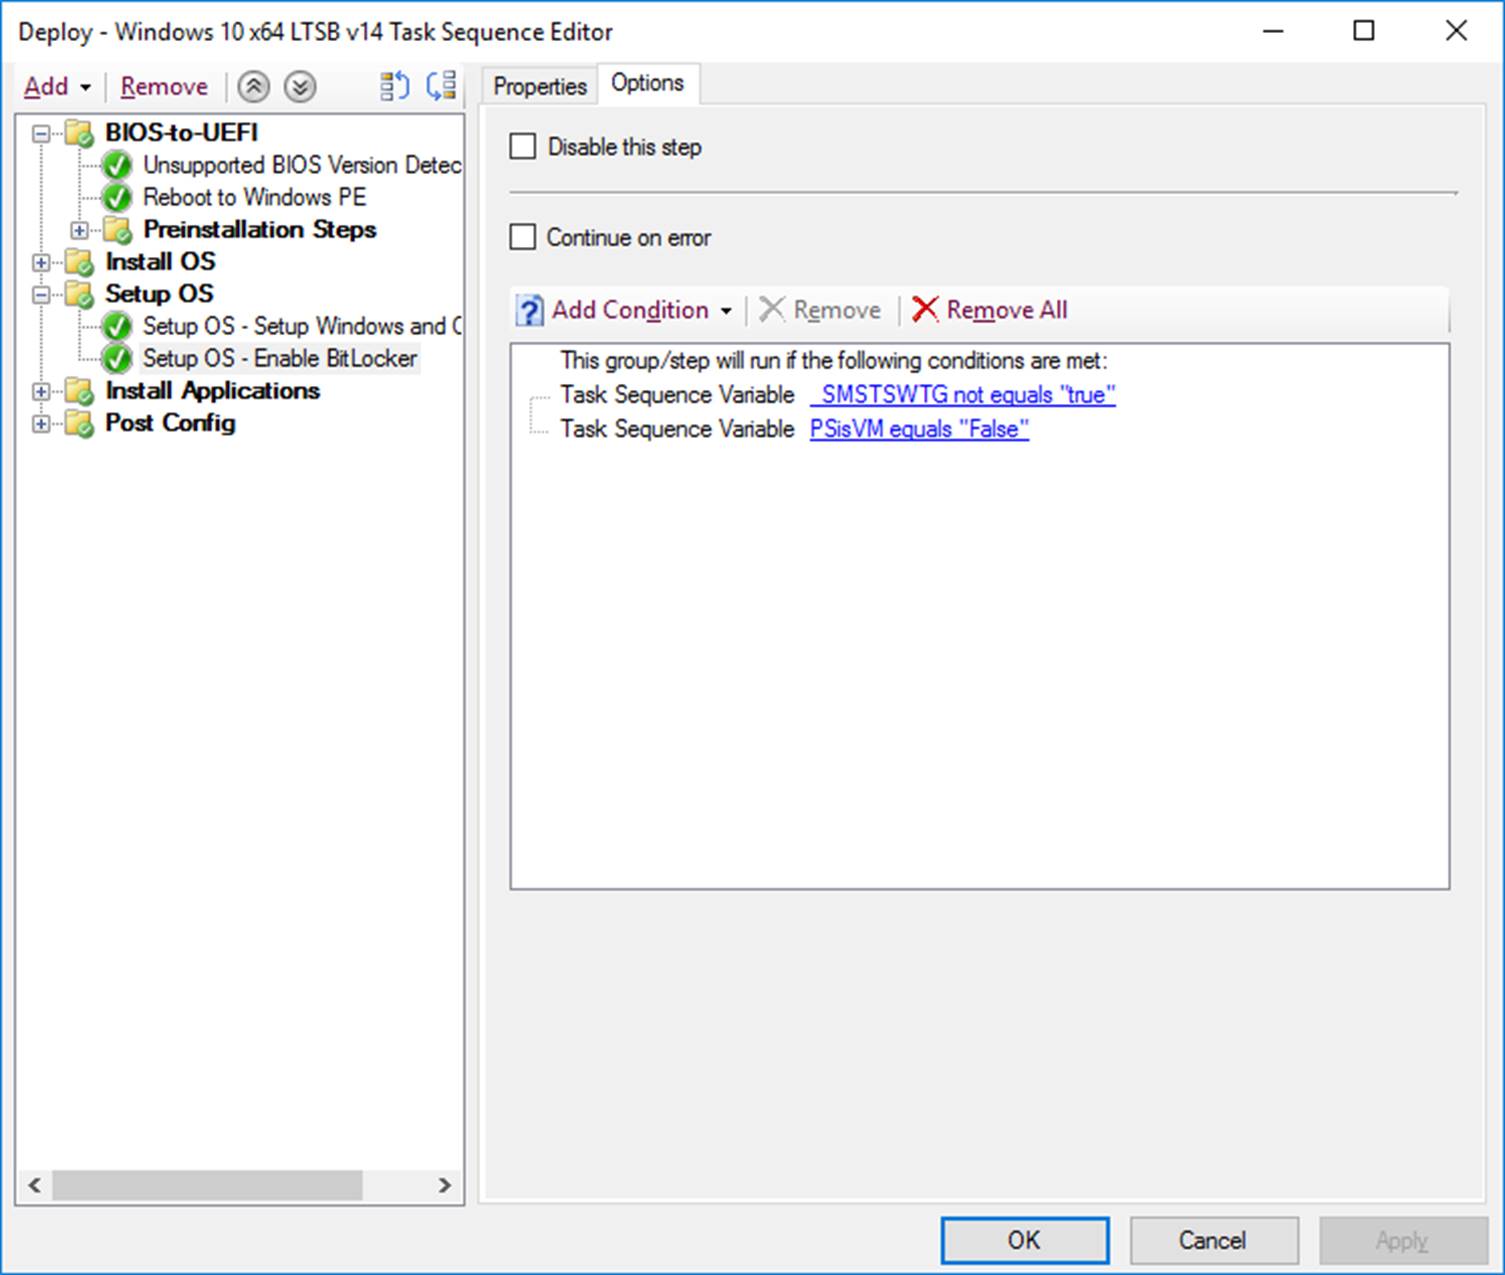
…and enable BitLocker with the following options

Filtered to ensure it isn’t a Windows To Go Device or a VM
Finally I install my packaged applications and carry out some post installation tasks such as copying some install info using a powershell script as follows

|
1 2 3 4 5 6 7 8 9 10 11 12 13 14 15 16 17 18 19 20 21 22 23 |
[cc lang="powershell"]$regPath = "HKLM:\Software\Cloudwyse\BuildInfo" $TSEnv = New-Object -COMObject Microsoft.SMS.TSEnvironment $DateTime = (Get-Date).ToString('dd/MM/yy hh:mm') $AdvertisementID = $TSEnv.value("_SMSTSAdvertID") $Organisation = $TSEnv.value("_SMSTSOrgName") $TaskSequenceID = $TSEnv.value("_SMSTSPackageID") $Packagename = $TSEnv.value("_SMSTSPackageName") $MediaType = $TSEnv.value("_SMSTSMediaType") $TSVersion = $TSEnv.value("TSVersion") $ClientVersion = $TSEnv.value("Clientversion") $MachineName = $TSEnv.value("_SMSTSMachineName") $Installationmode = $TSEnv.value("_SMSTSLaunchMode") New-Item -Path $regPath -Force | Out-Null New-ItemProperty -Path $regPath -Name "Date" -Value $DateTime -PropertyType String -Force | Out-Null New-ItemProperty -Path $regPath -Name "Advertisement ID" -Value $AdvertisementID -PropertyType String -Force | Out-Null New-ItemProperty -Path $regPath -Name "Organisation" -Value $Organisation -PropertyType String -Force | Out-Null New-ItemProperty -Path $regPath -Name "Task SequenceID" -Value $TaskSequenceID -PropertyType String -Force | Out-Null New-ItemProperty -Path $regPath -Name "Package Name" -Value $Packagename -PropertyType String -Force | Out-Null New-ItemProperty -Path $regPath -Name "Media Type" -Value $MediaType -PropertyType String -Force | Out-Null New-ItemProperty -Path $regPath -Name "TS Version" -Value $TSVersion -PropertyType String -Force | Out-Null New-ItemProperty -Path $regPath -Name "Client Version" -Value $ClientVersion -PropertyType String -Force | Out-Null New-ItemProperty -Path $regPath -Name "Machine Name" -Value $MachineName -PropertyType String -Force | Out-Null New-ItemProperty -Path $regPath -Name "Installation Mode" -Value $Installationmode -PropertyType String -Force | Out-Null[/cc] |
[…] You can see the detailed Task Sequence steps in this post. […]